User Guide
Reticle Calibration
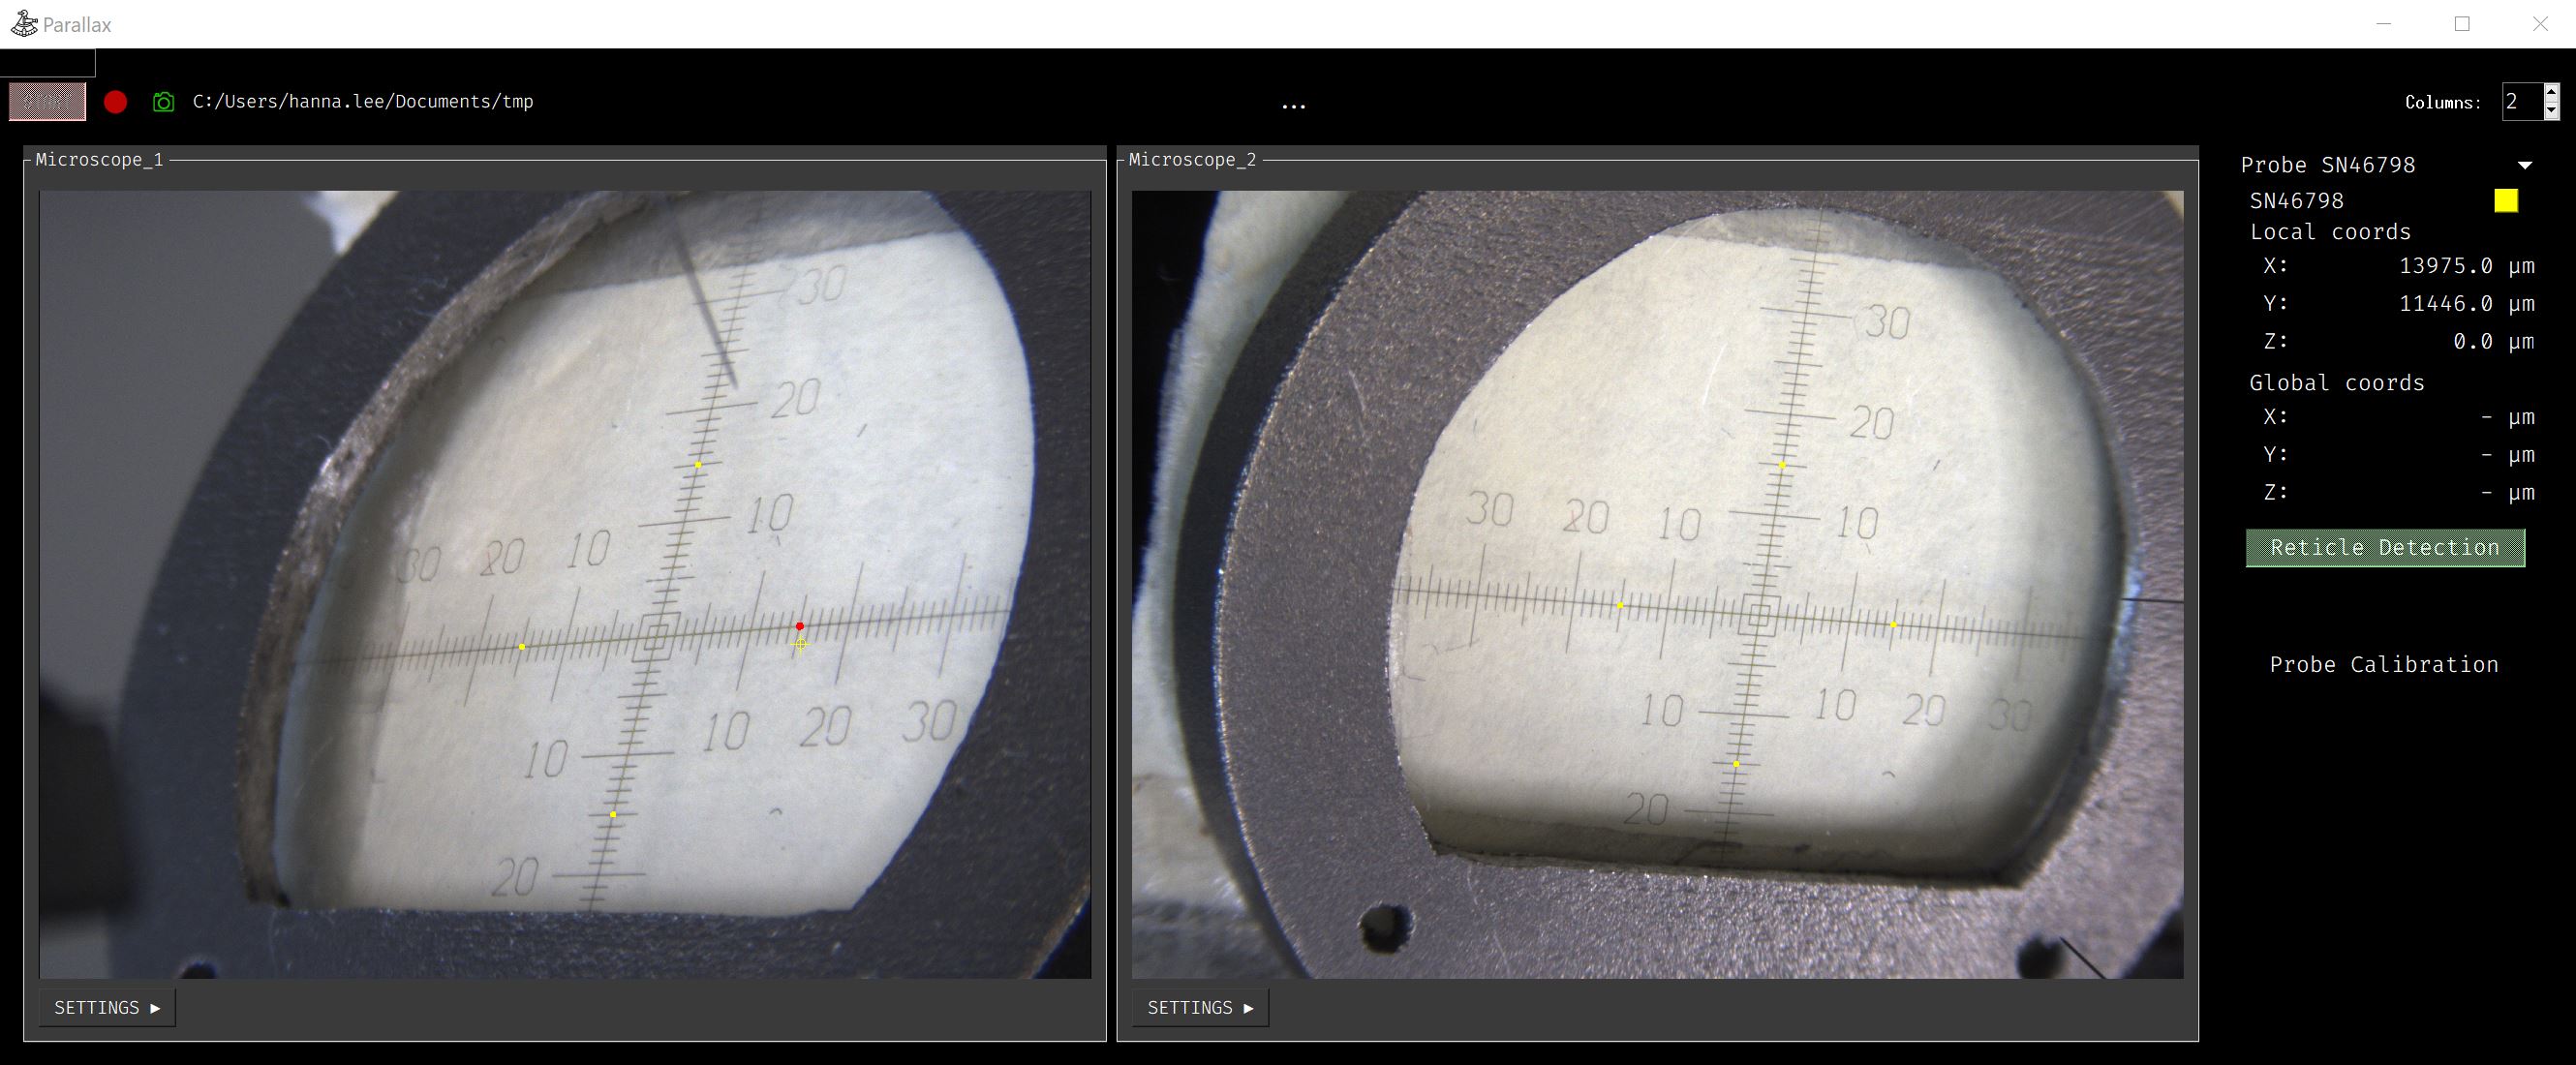
Click on the
Reticle Detectionbutton.
The reticle will be detected and displayed in the camera view.
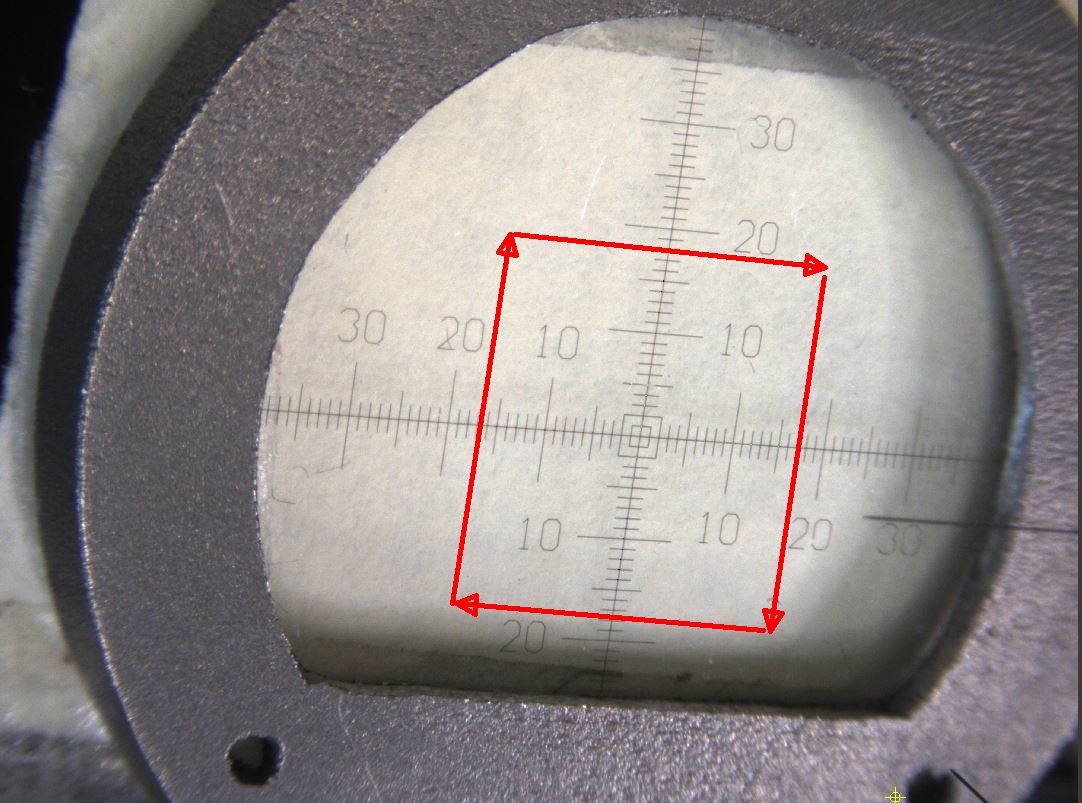
The camera view will display reticle coordinate ticks and the x, y, z axes.
Visually inspect the results, and click ‘Accept’ if the reticle is detected correctly. Otherwise, click ‘Reject’ to reset.
Click the positive-x coordinate of the reticle on each camera view.
Reprojection error of reticle points will appear.
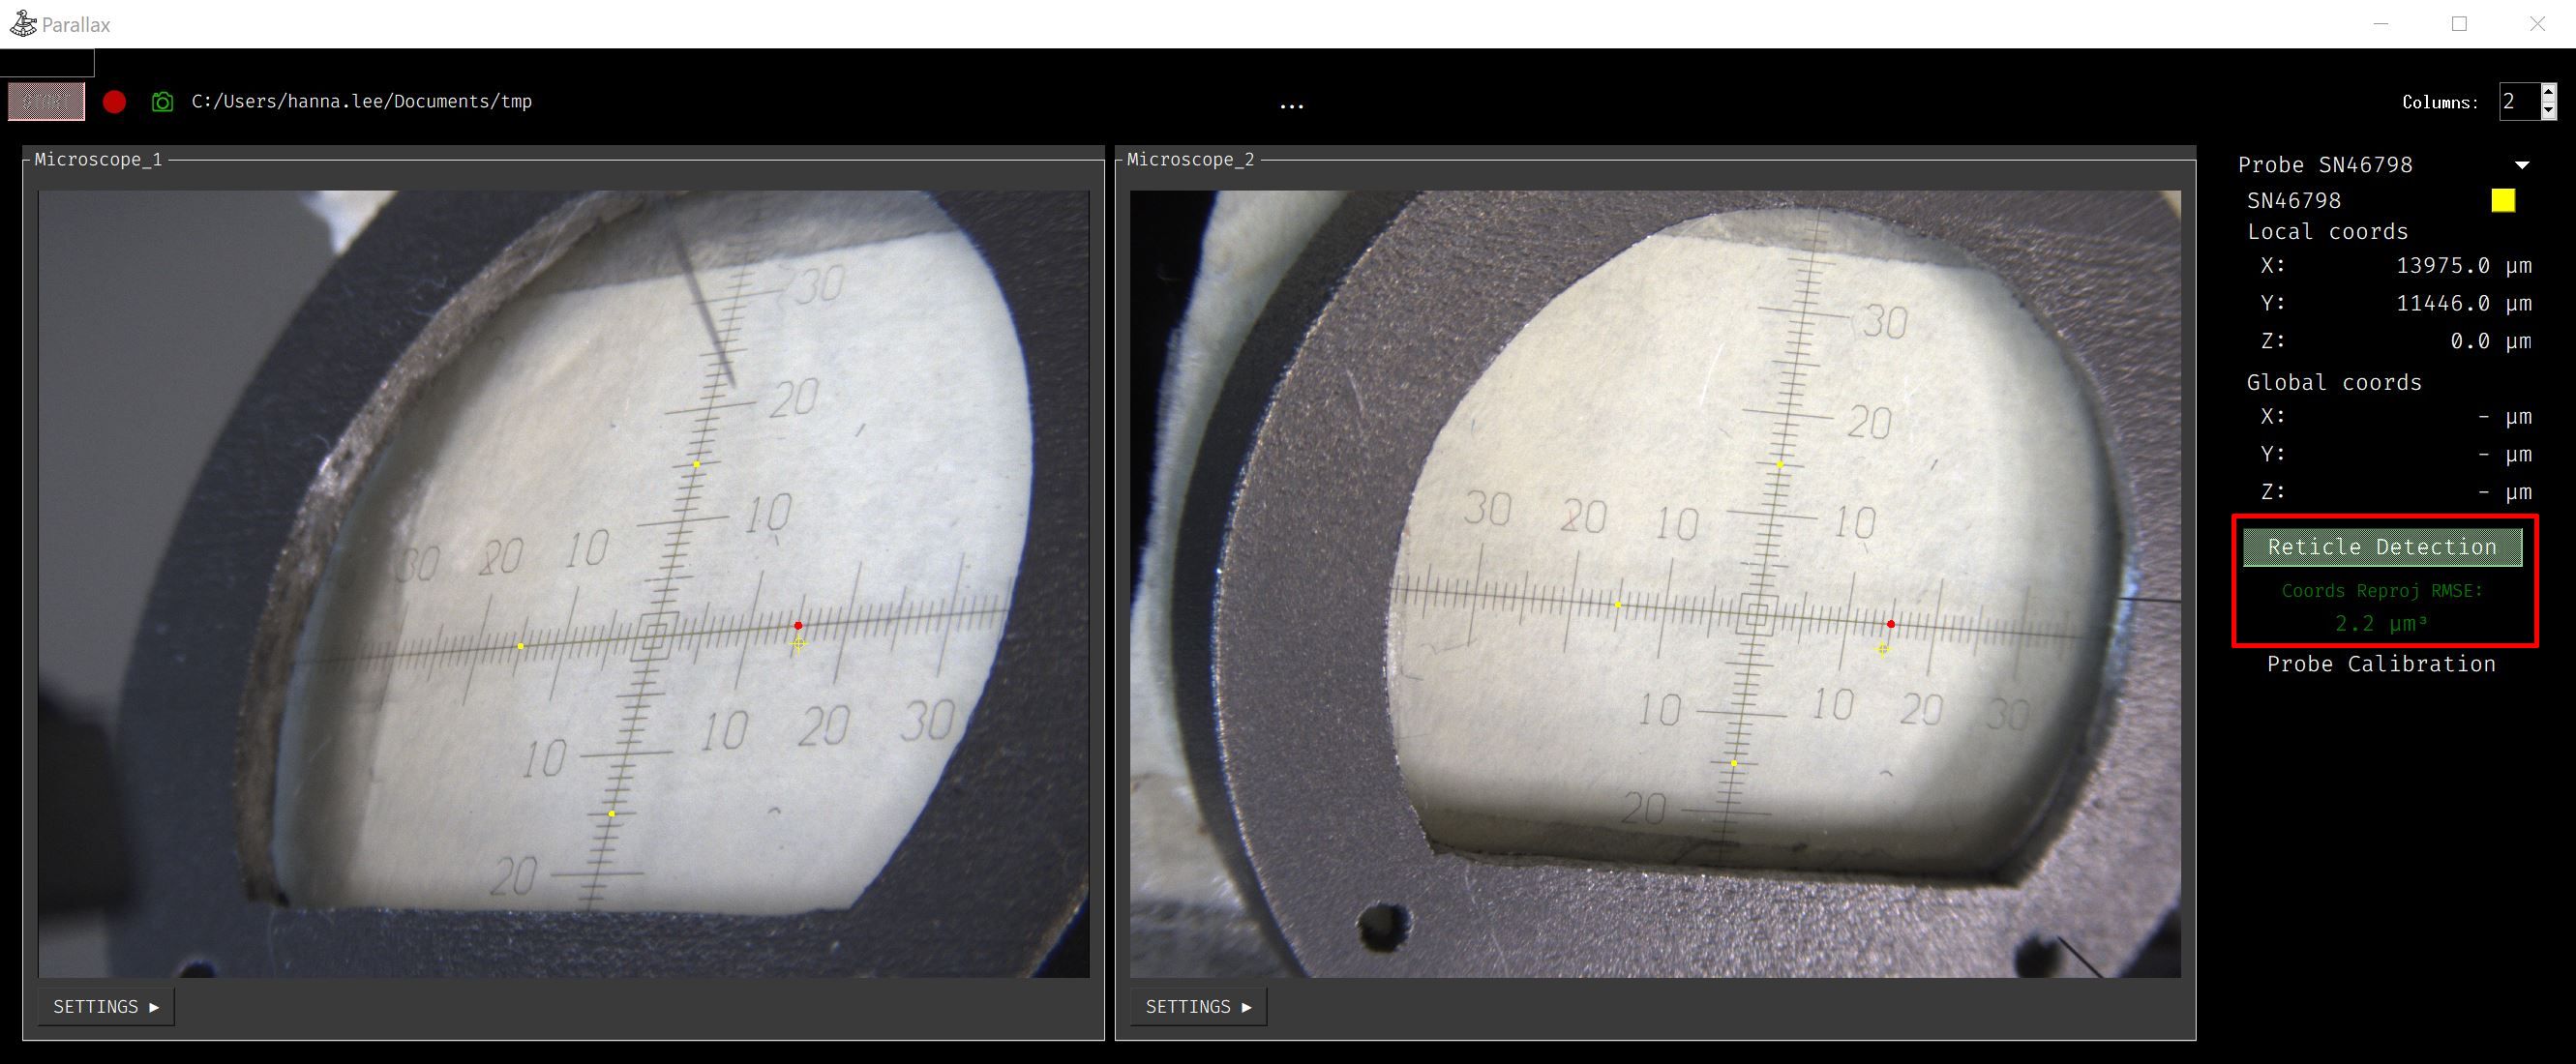
Tips: An error under 3.0 µm³ is good. An error under 5.0 µm³ is acceptable.
For more details, see the FAQs
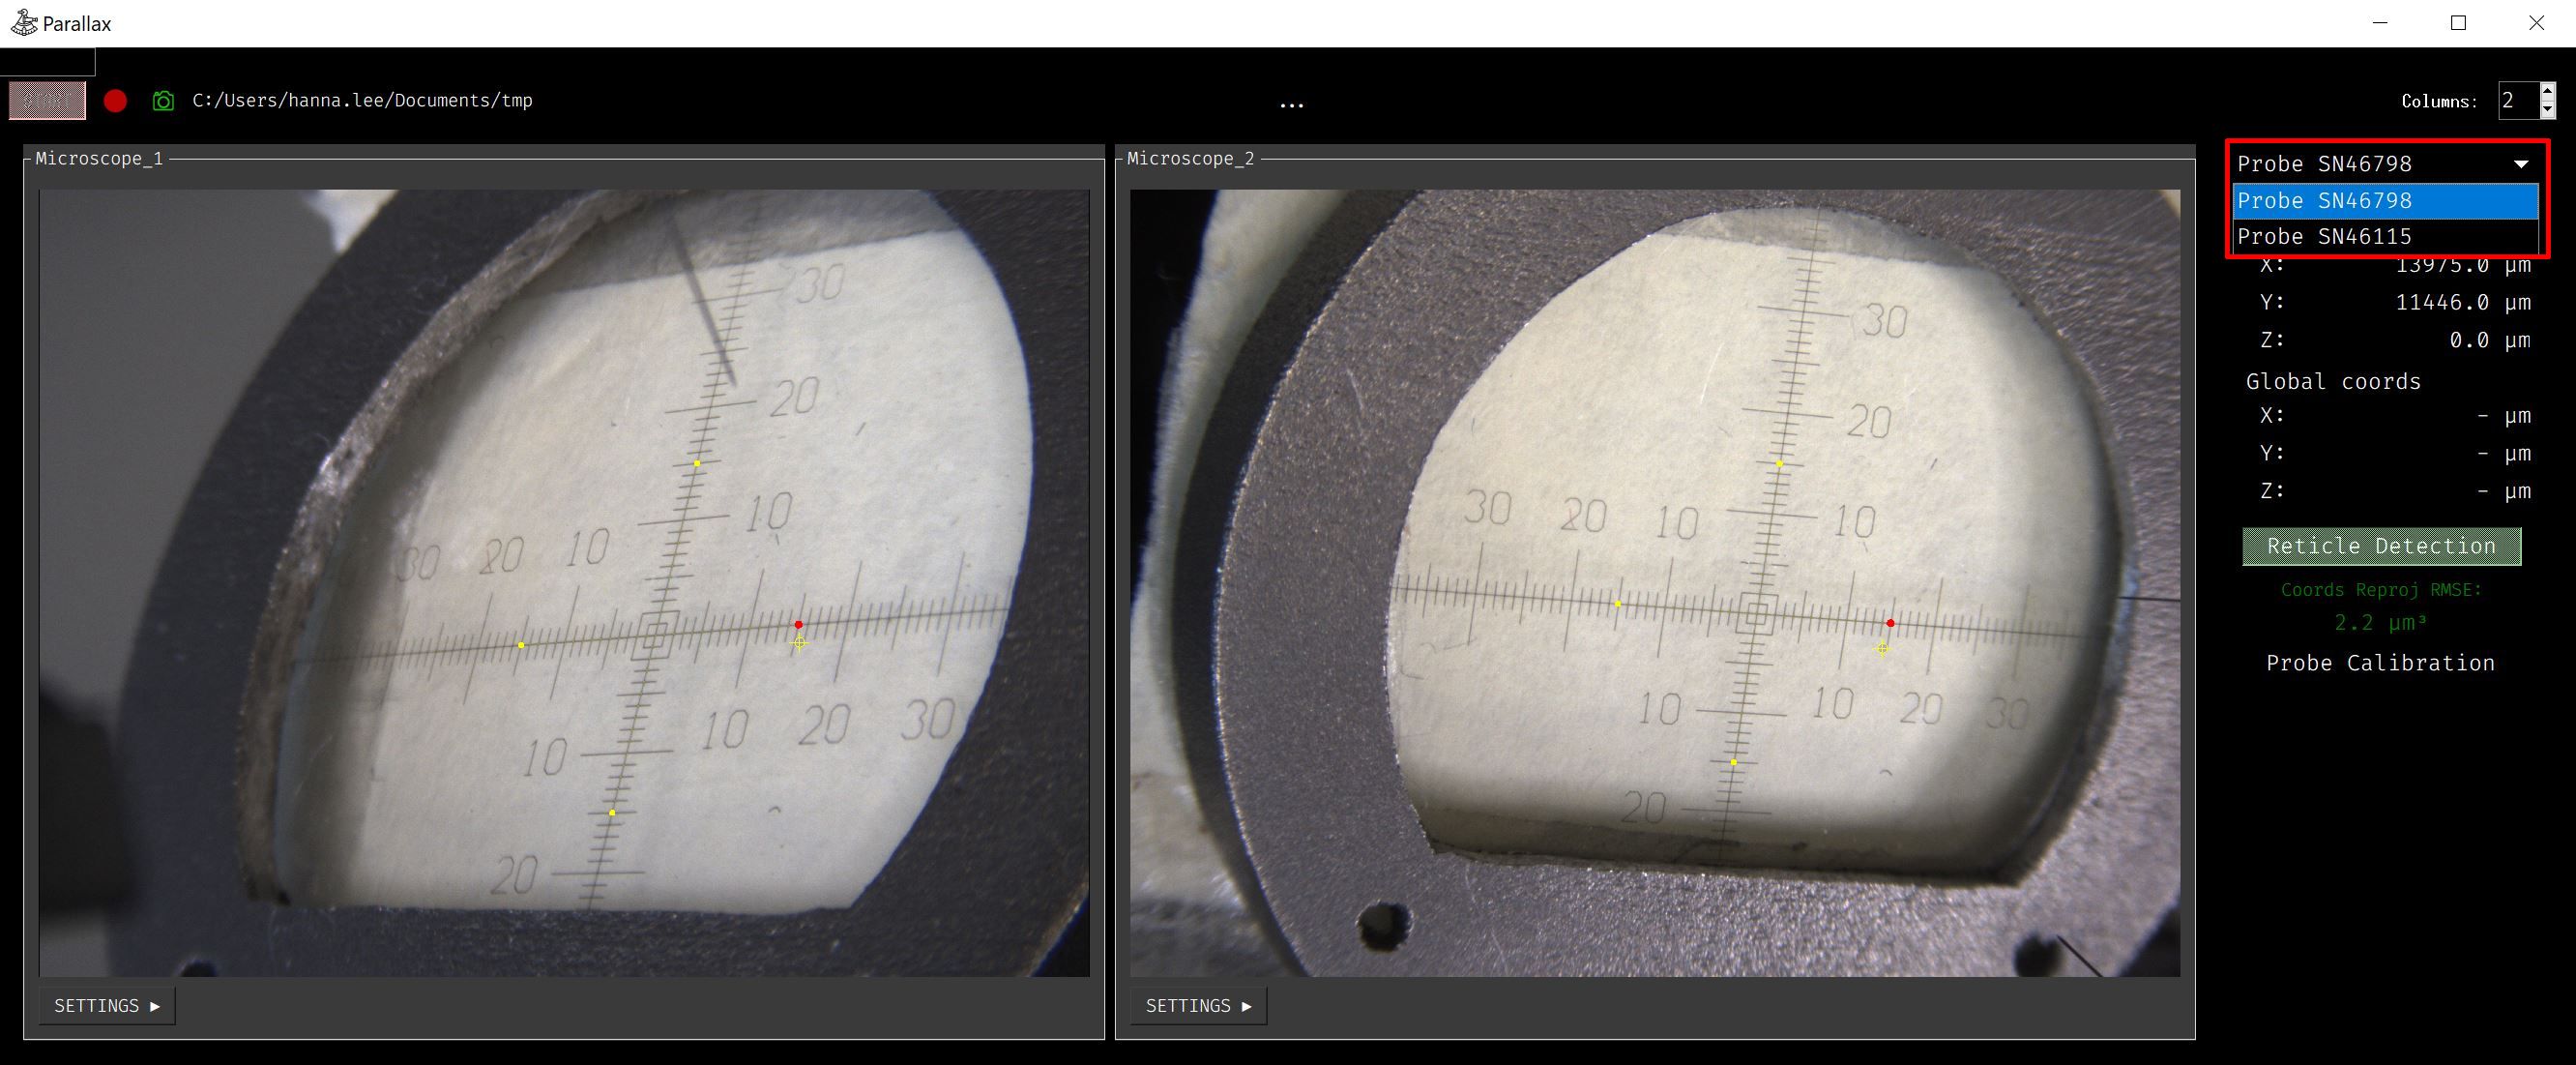
Probe Calibration
Select the stage you would like to calibrate after finishing reticle calibration.
Move the probe tip close to the reticle surface and click on the
Probe Calibrationbutton.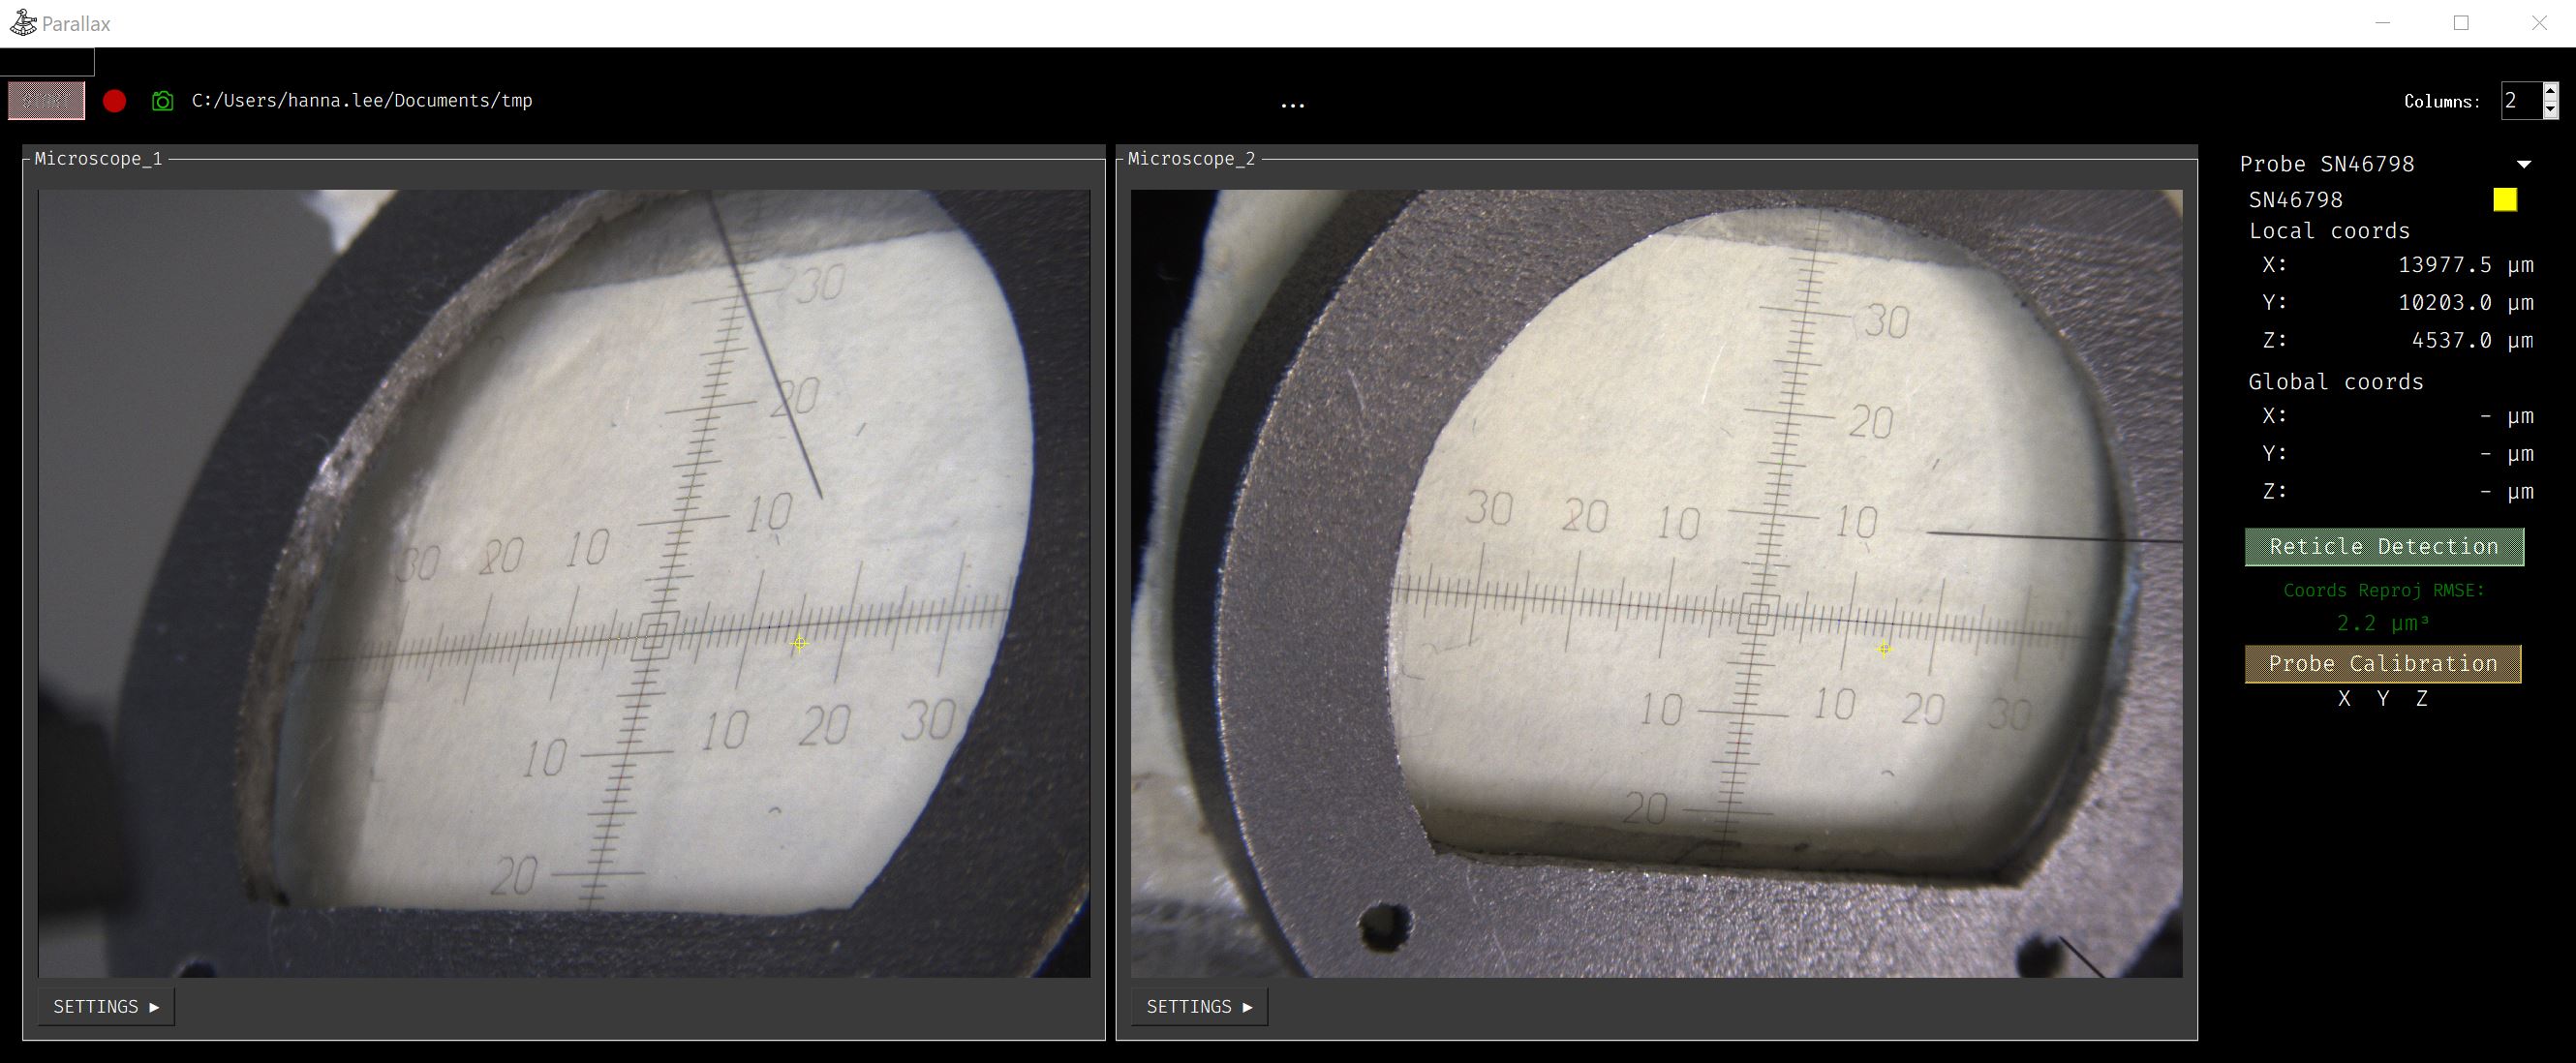
Tip: Bring the probe tip close to the reticle surface, as the focus in the camera view is set to the reticle. This helps detect the probe tip location more precisely.
Move the probe in the x, y, z directions at least 2 mm.

When moving the probe, continue alternating between stopping and moving the stage. When the stage is stopped, the tip point color turns red, representing the points used for probe calibration. When the stage is moving, the tip turns yellow, indicating only the location of the stage. Therefore, it is necessary to stop several times for the probe calibration process.
Once the probe has traveled far enough along each axis, the UI for the corresponding axis will turn green.
Even if all axes are green, additional movement may be necessary to improve the fit between the local motor coordinates and the global 3D points.
After calibration, the UI will turn green and the global coordinates will display the tip location relative to the reticle coordinates.
Global coordinates show the probe tip location in the reticle coordinate system.
Tip: Try to hit a known point, such as the center of the reticle, to check the accuracy of the probe calibration.

Repeat steps 1-4 for any other probes that need to be calibrated.