Programmer’s Guide
Reticle Detection
Overview

Reticle detection involves a computer vision pipeline. Here is the general process:
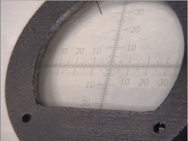
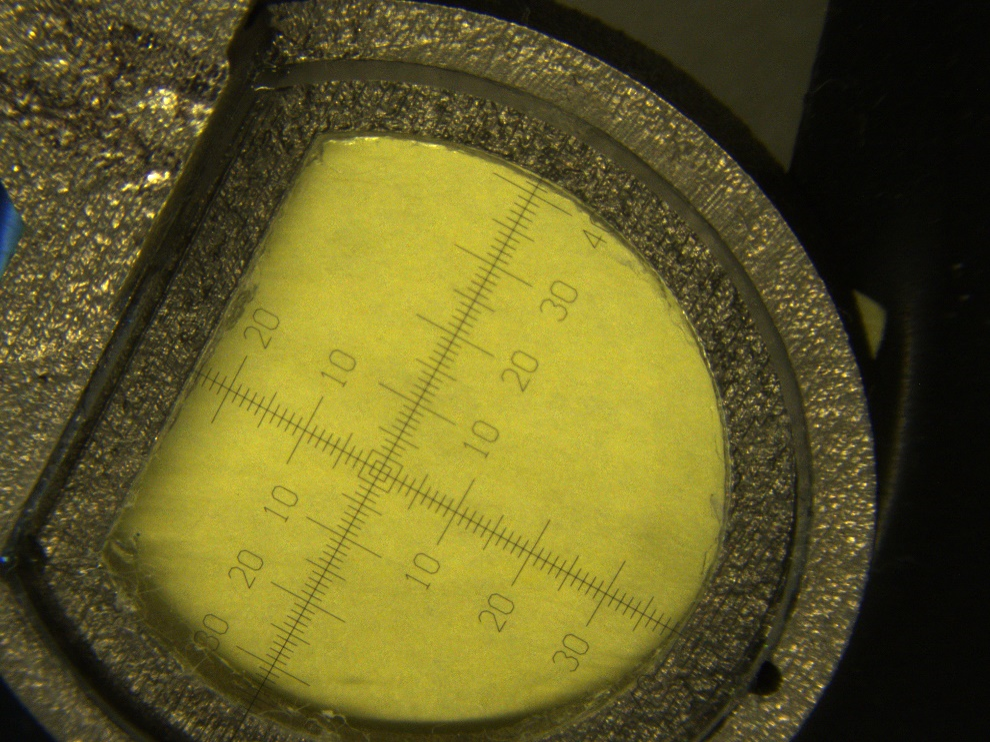
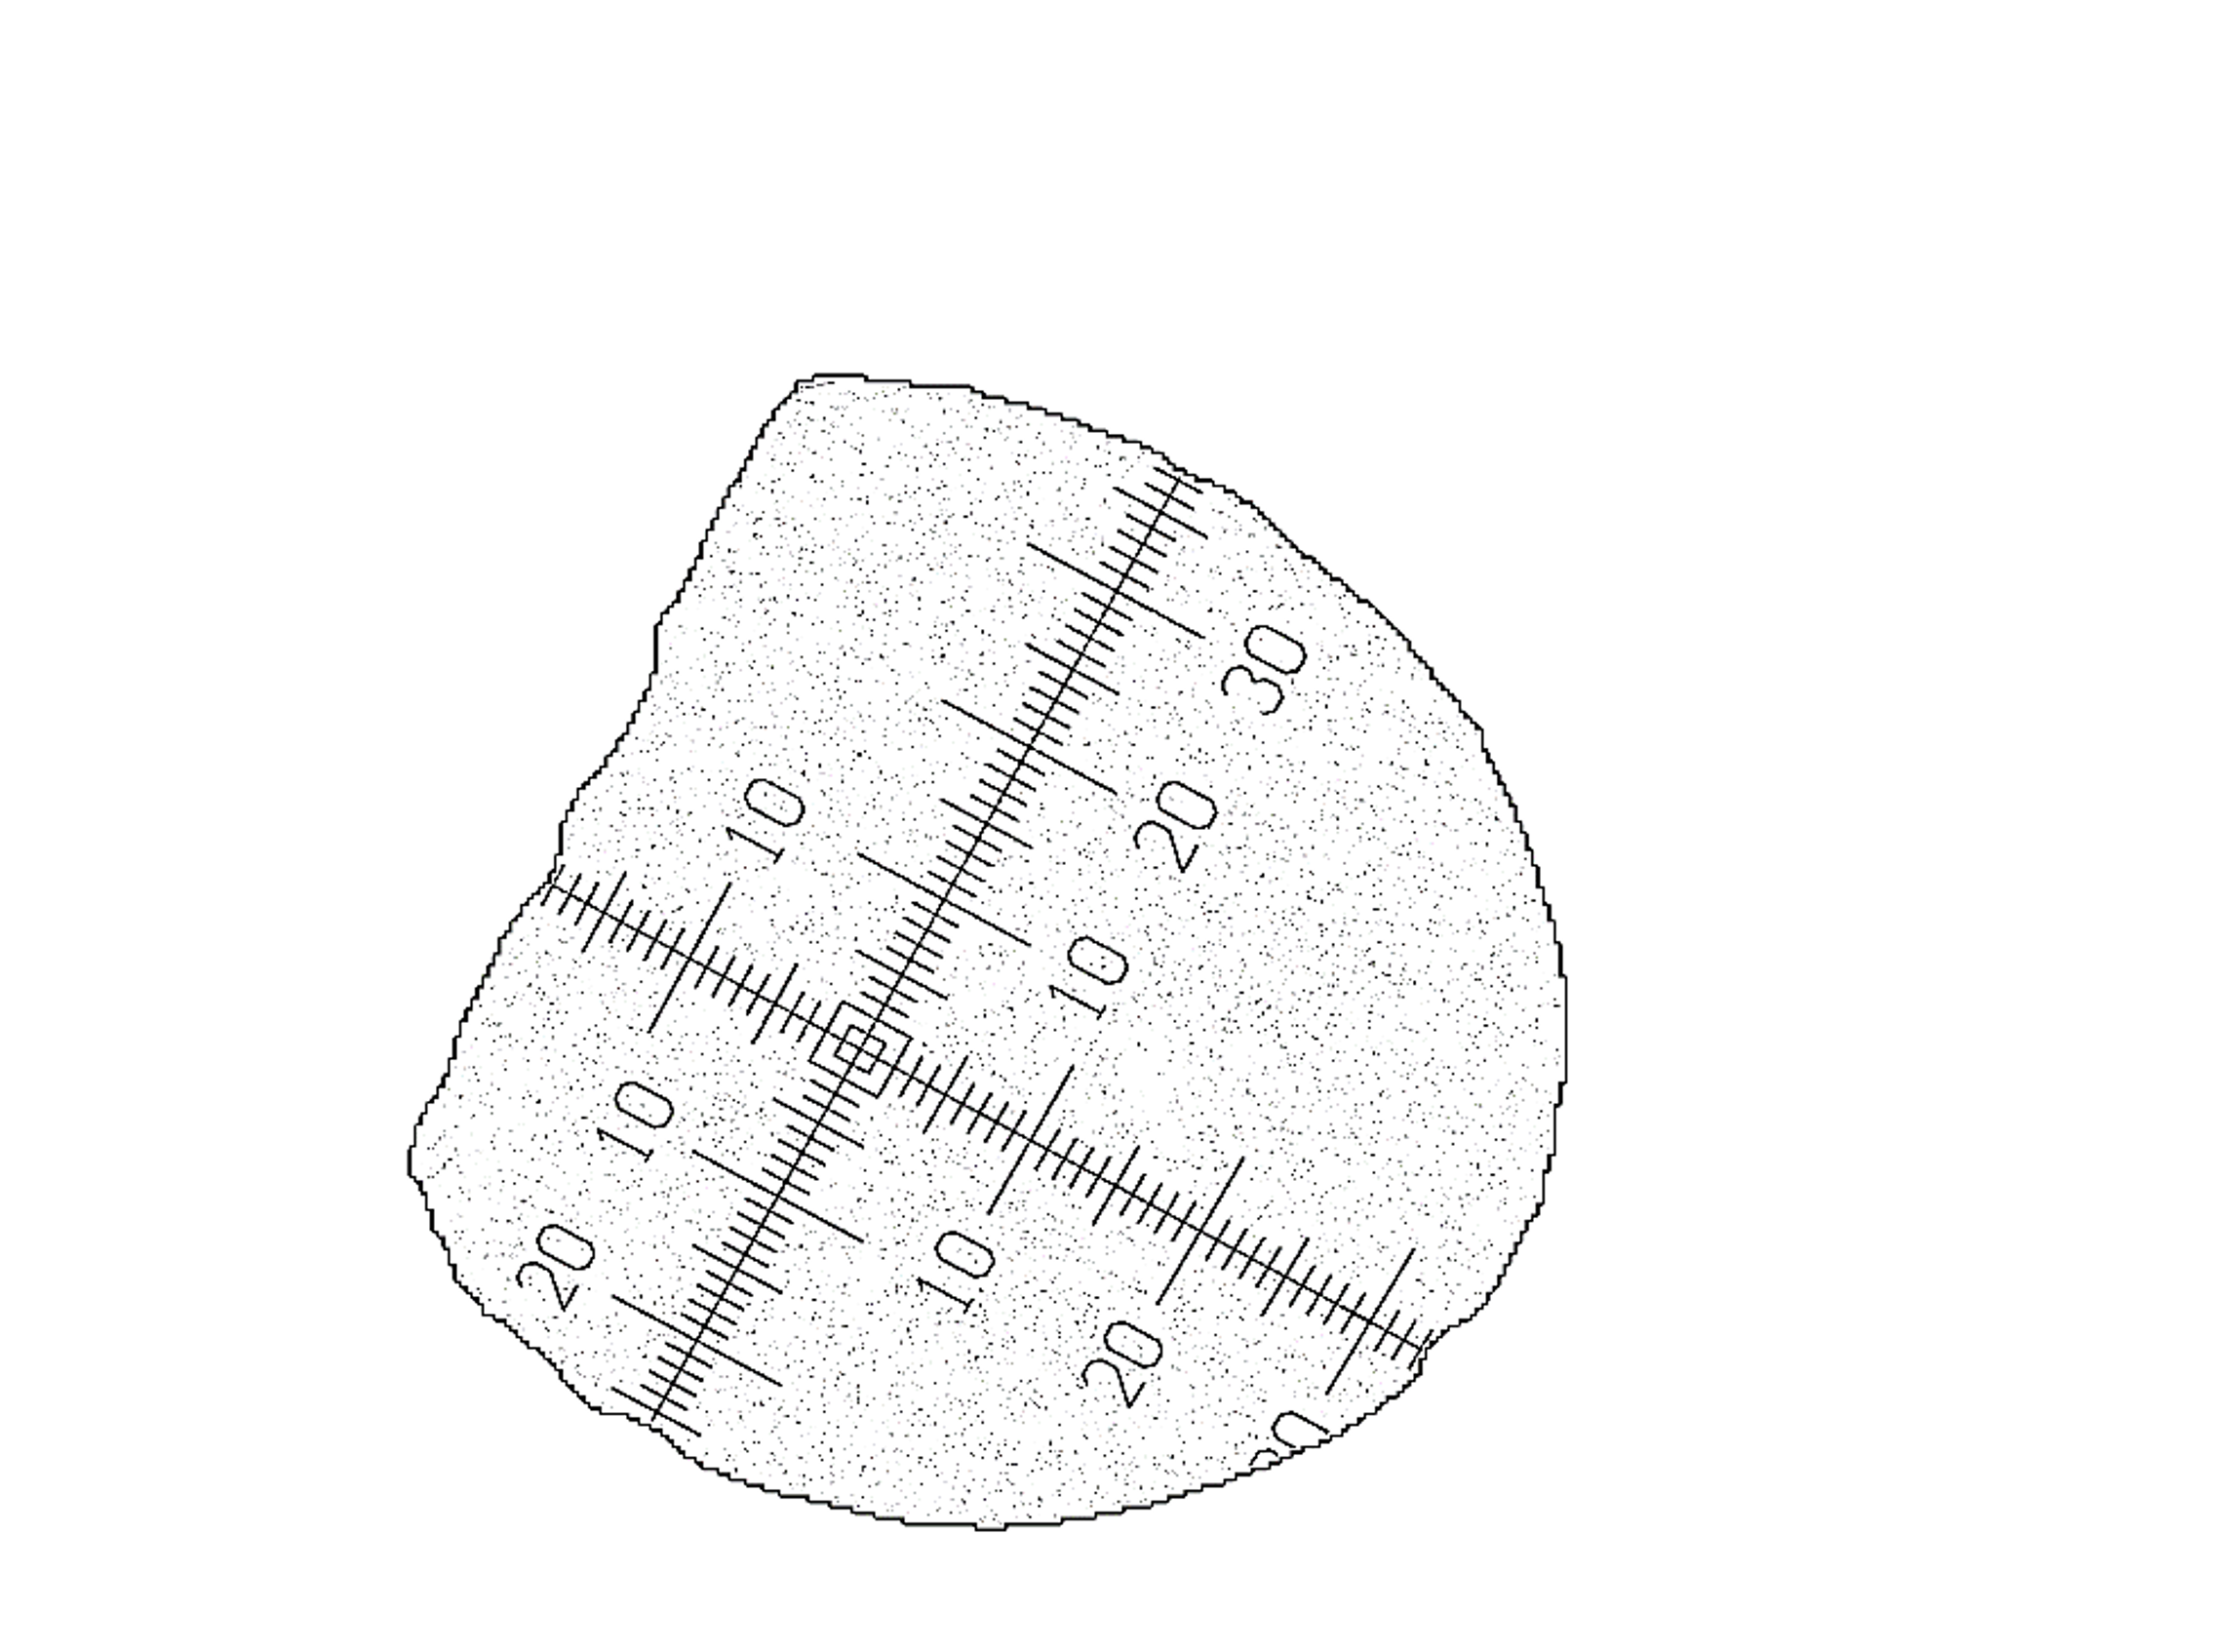
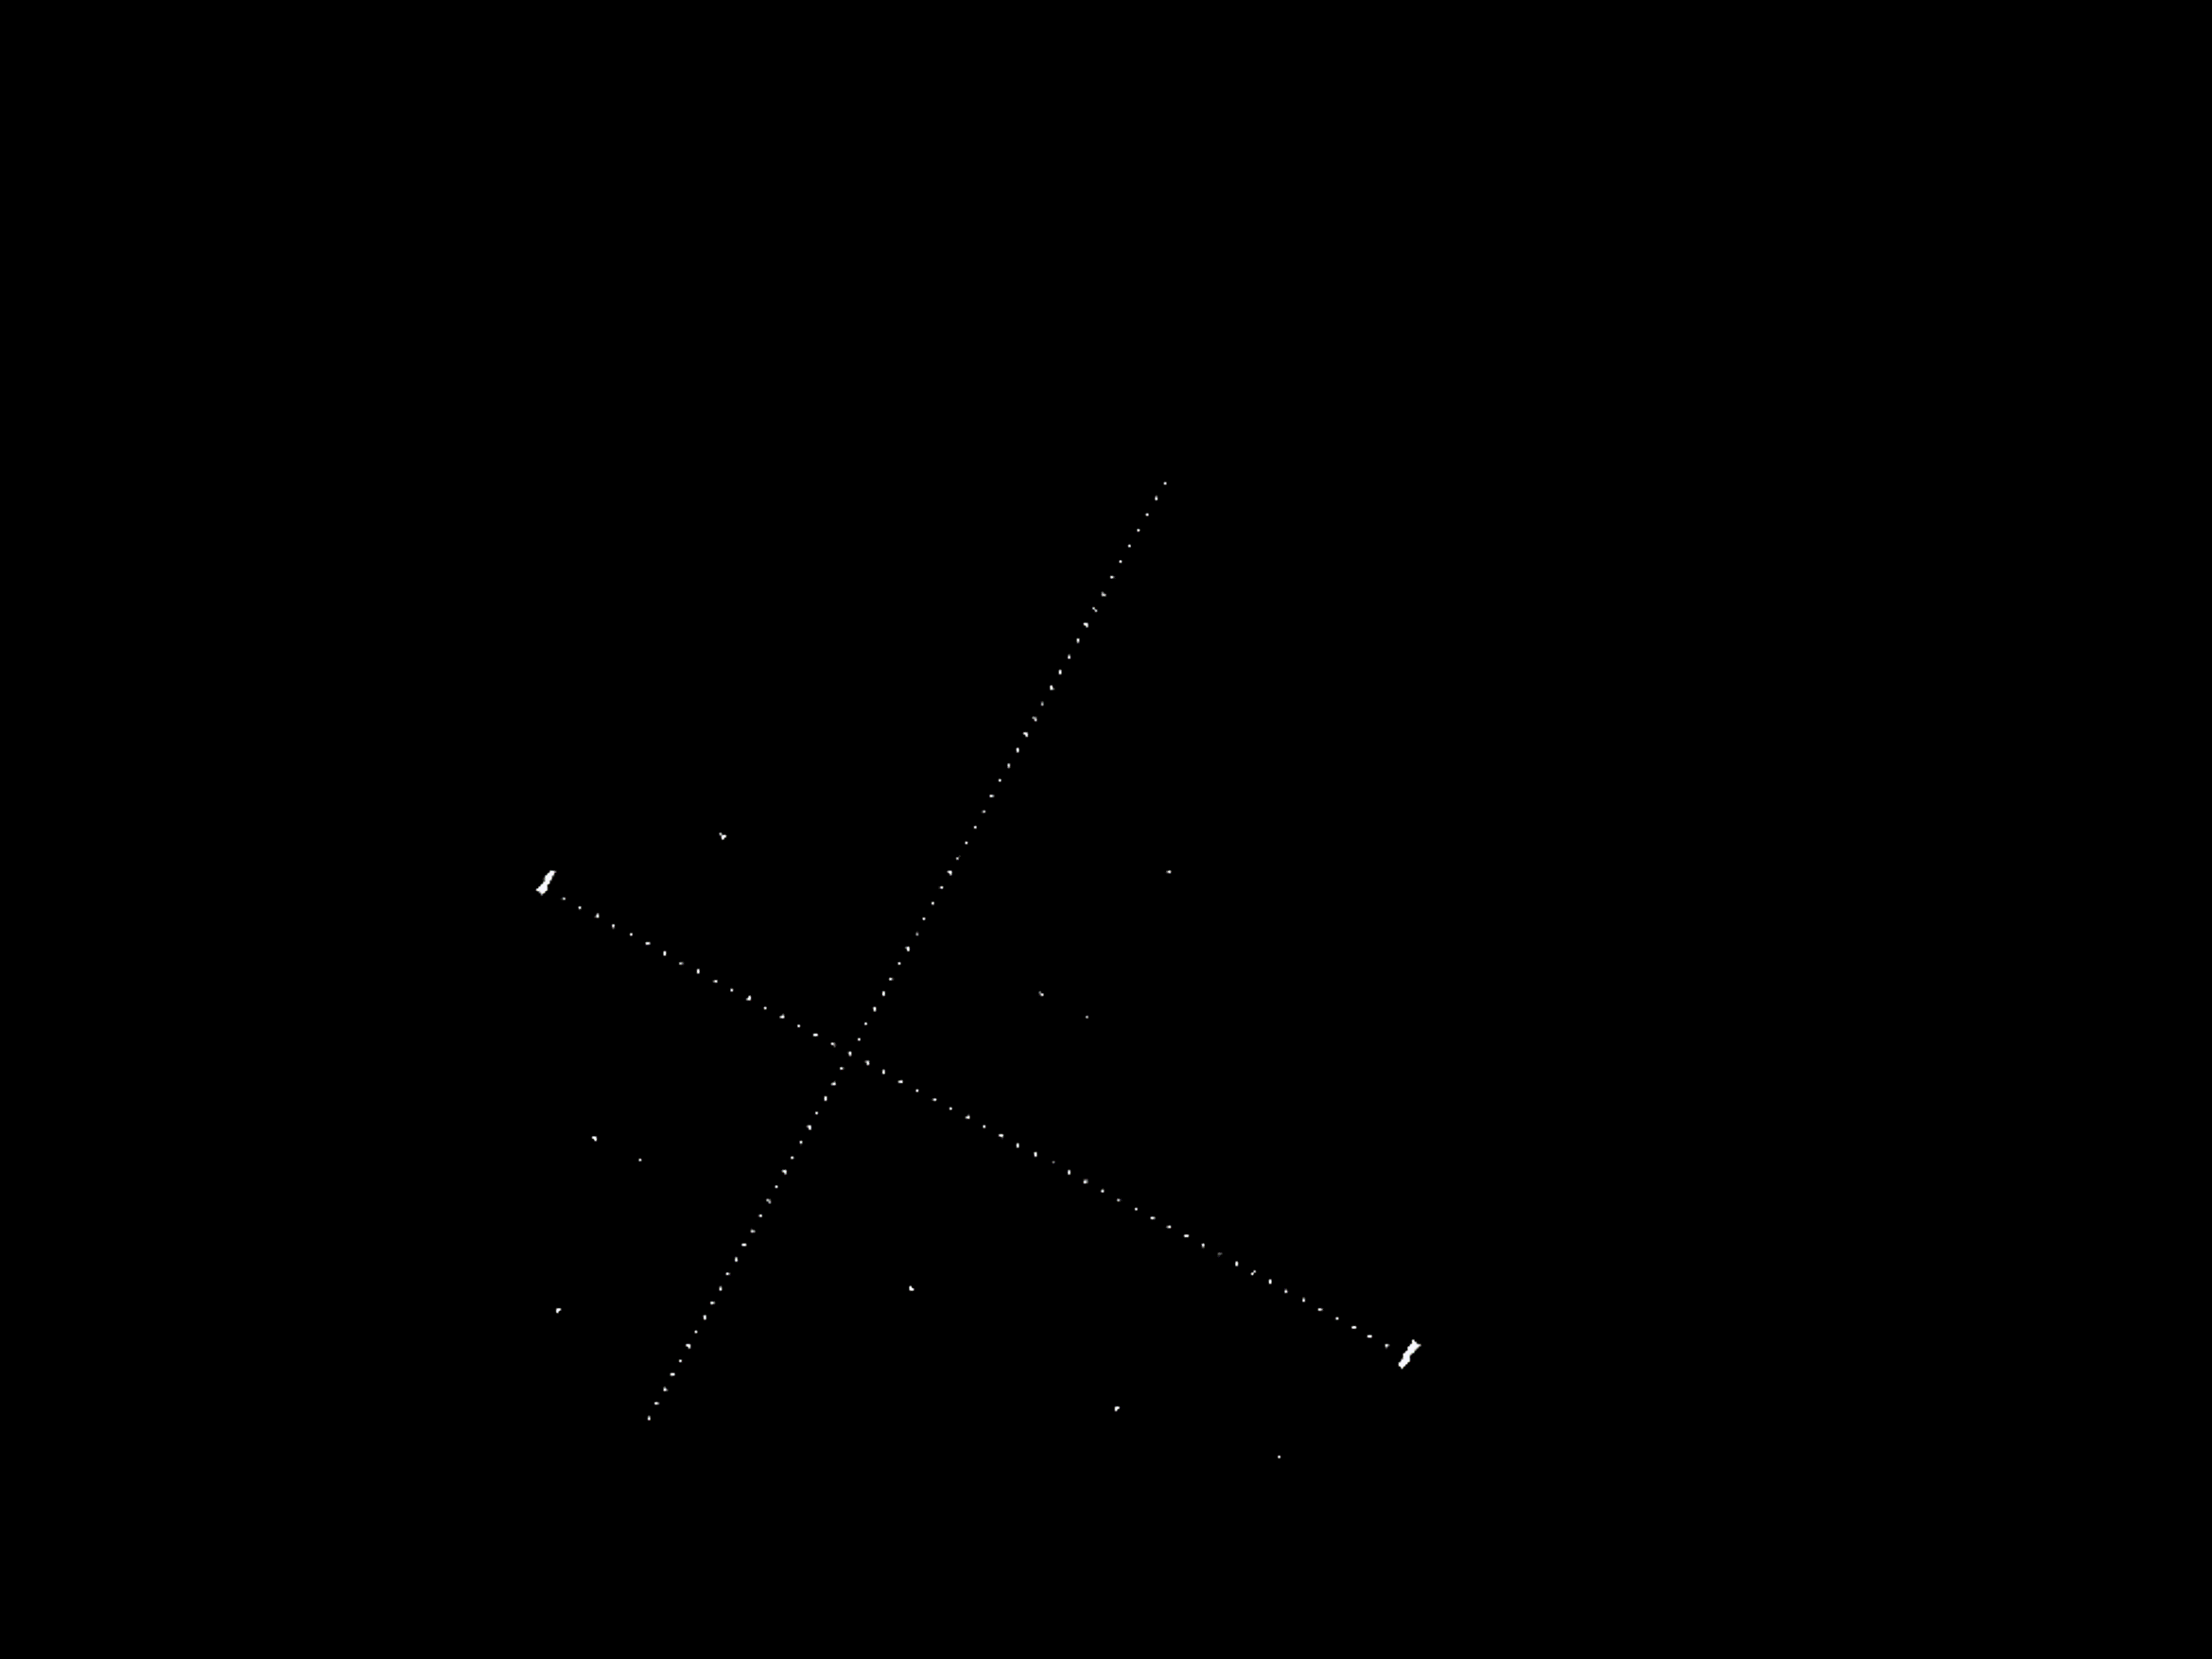
Original Image: This is the starting point, where you can view a reticle from the camera.
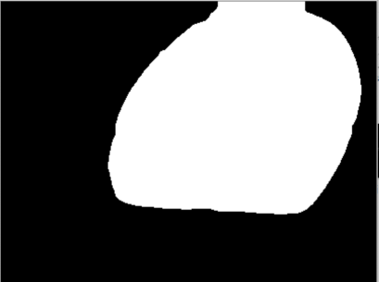
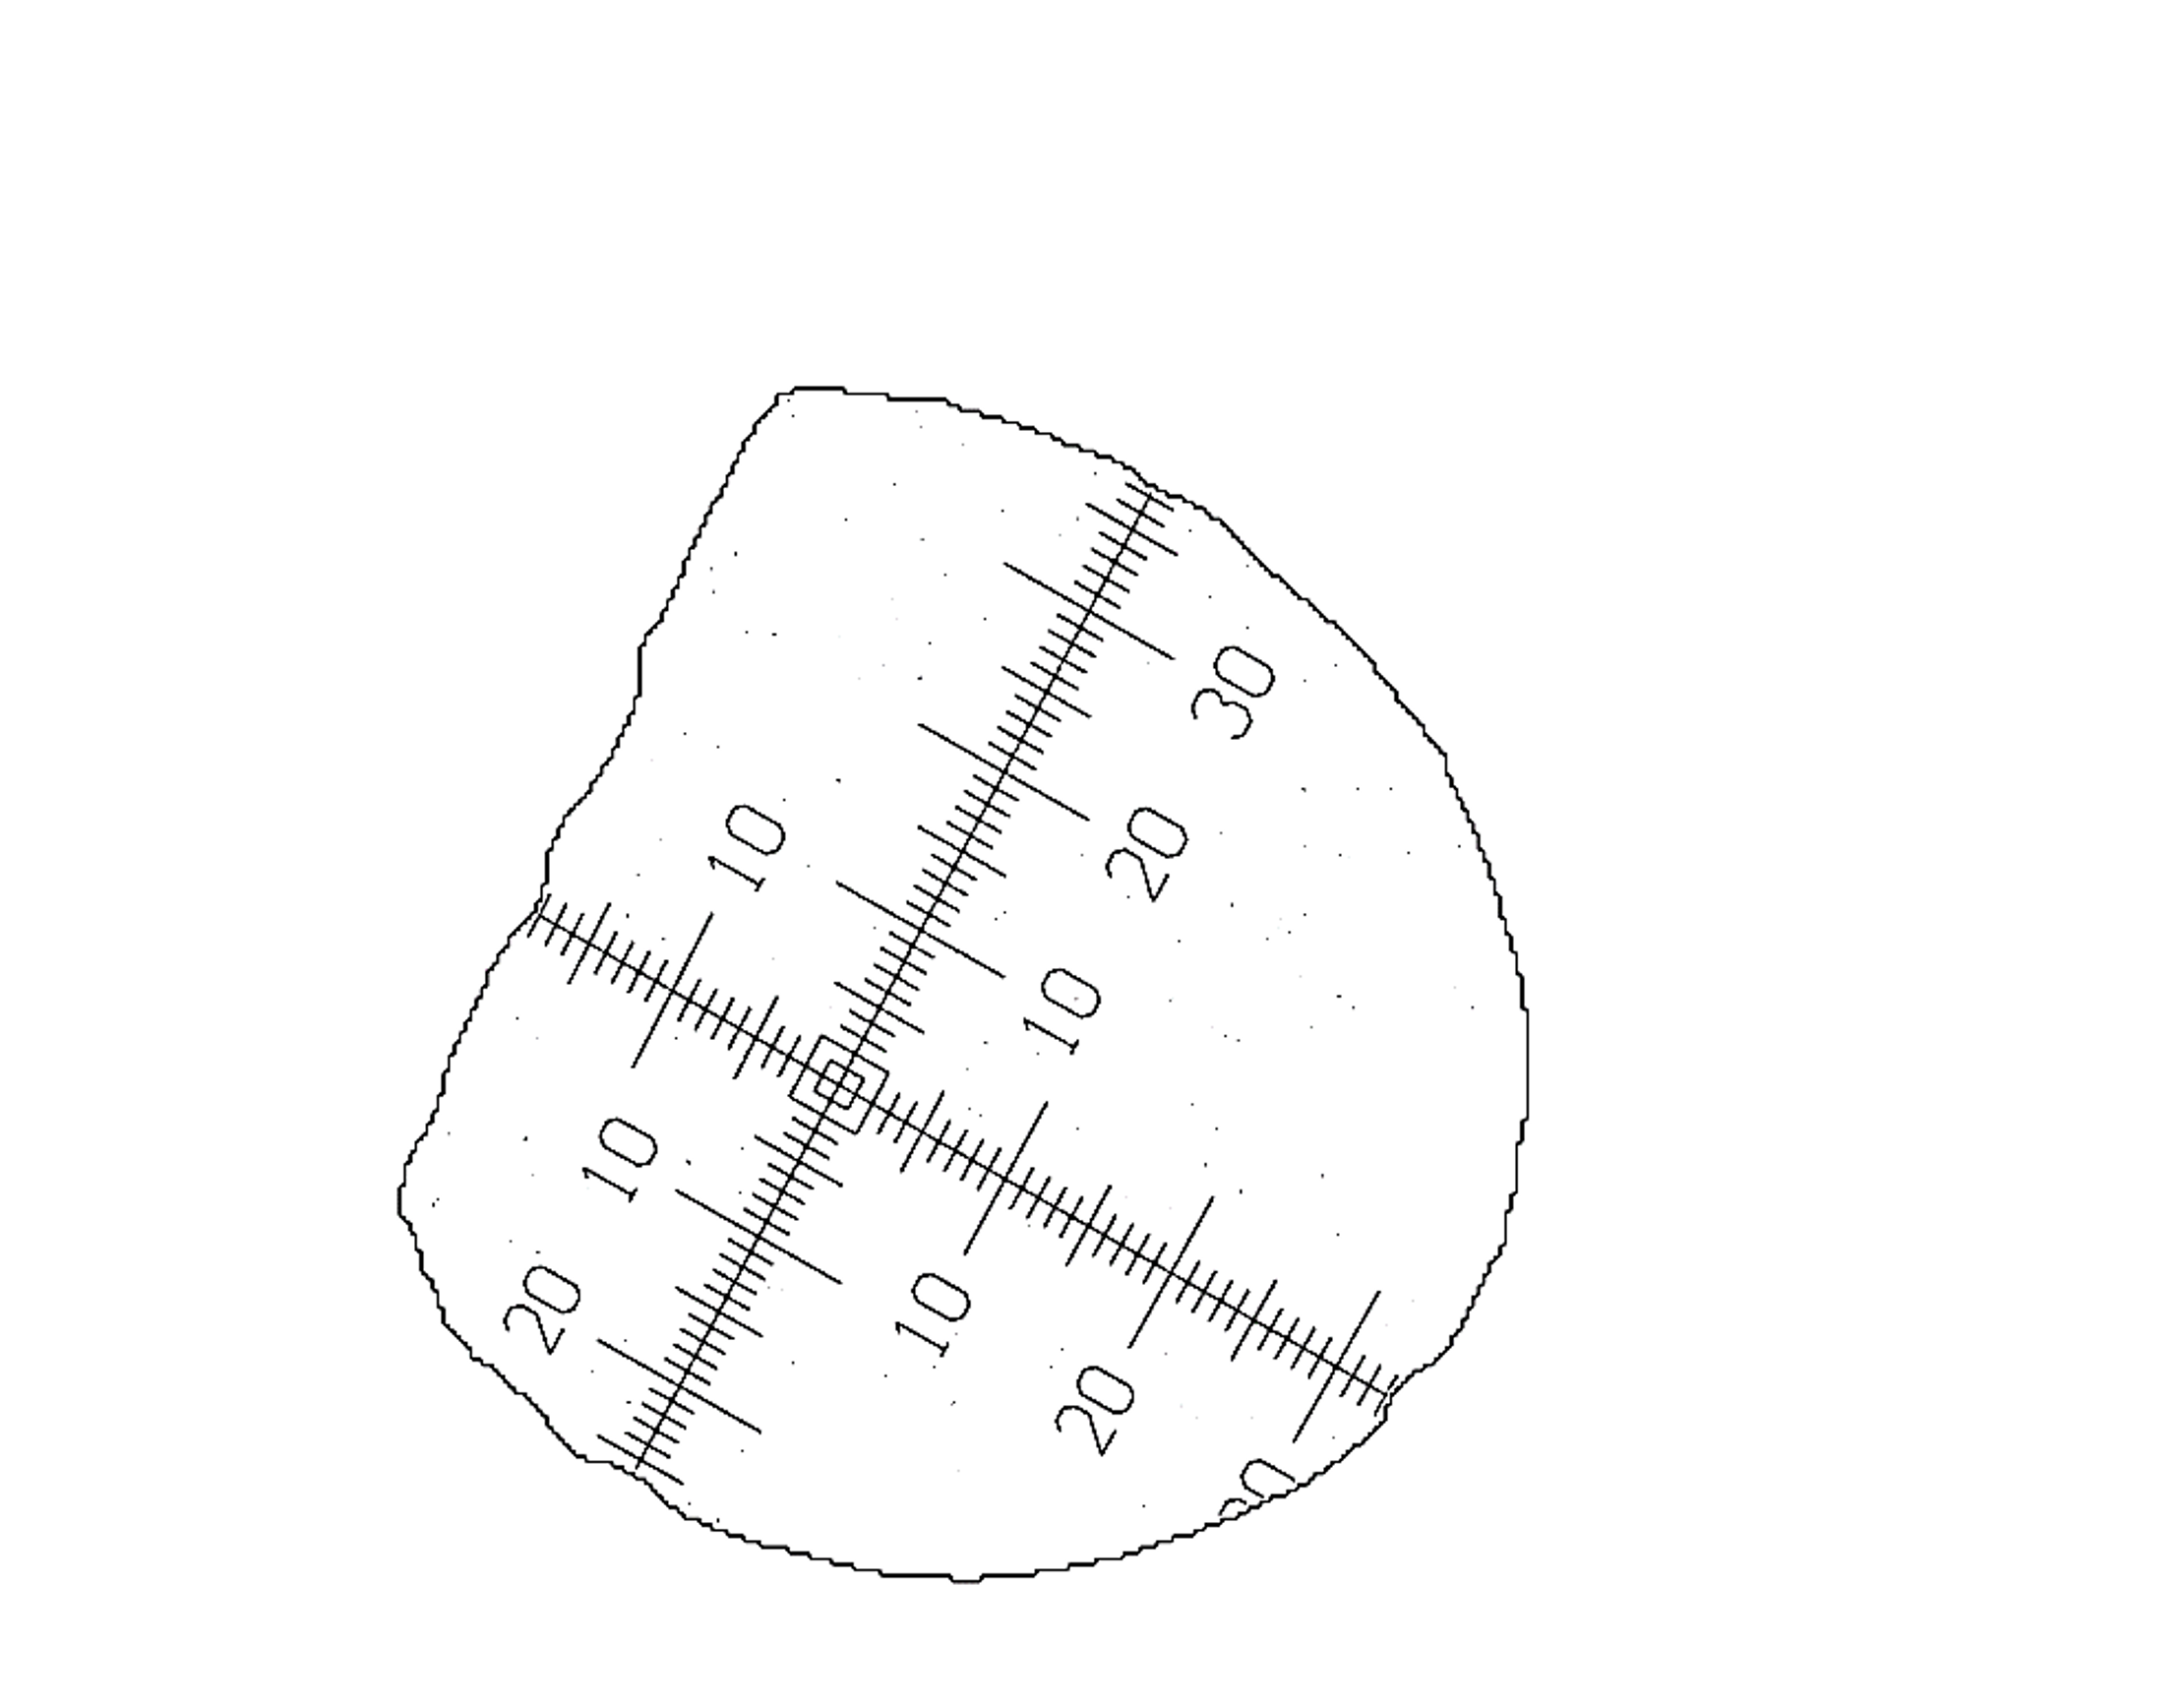
Mask Generated: A mask is created from the original image in binary form. This mask highlights or separates key areas of the image—the reticle—from the background, including the metal parts of the reticle window, making it easier for further processing.
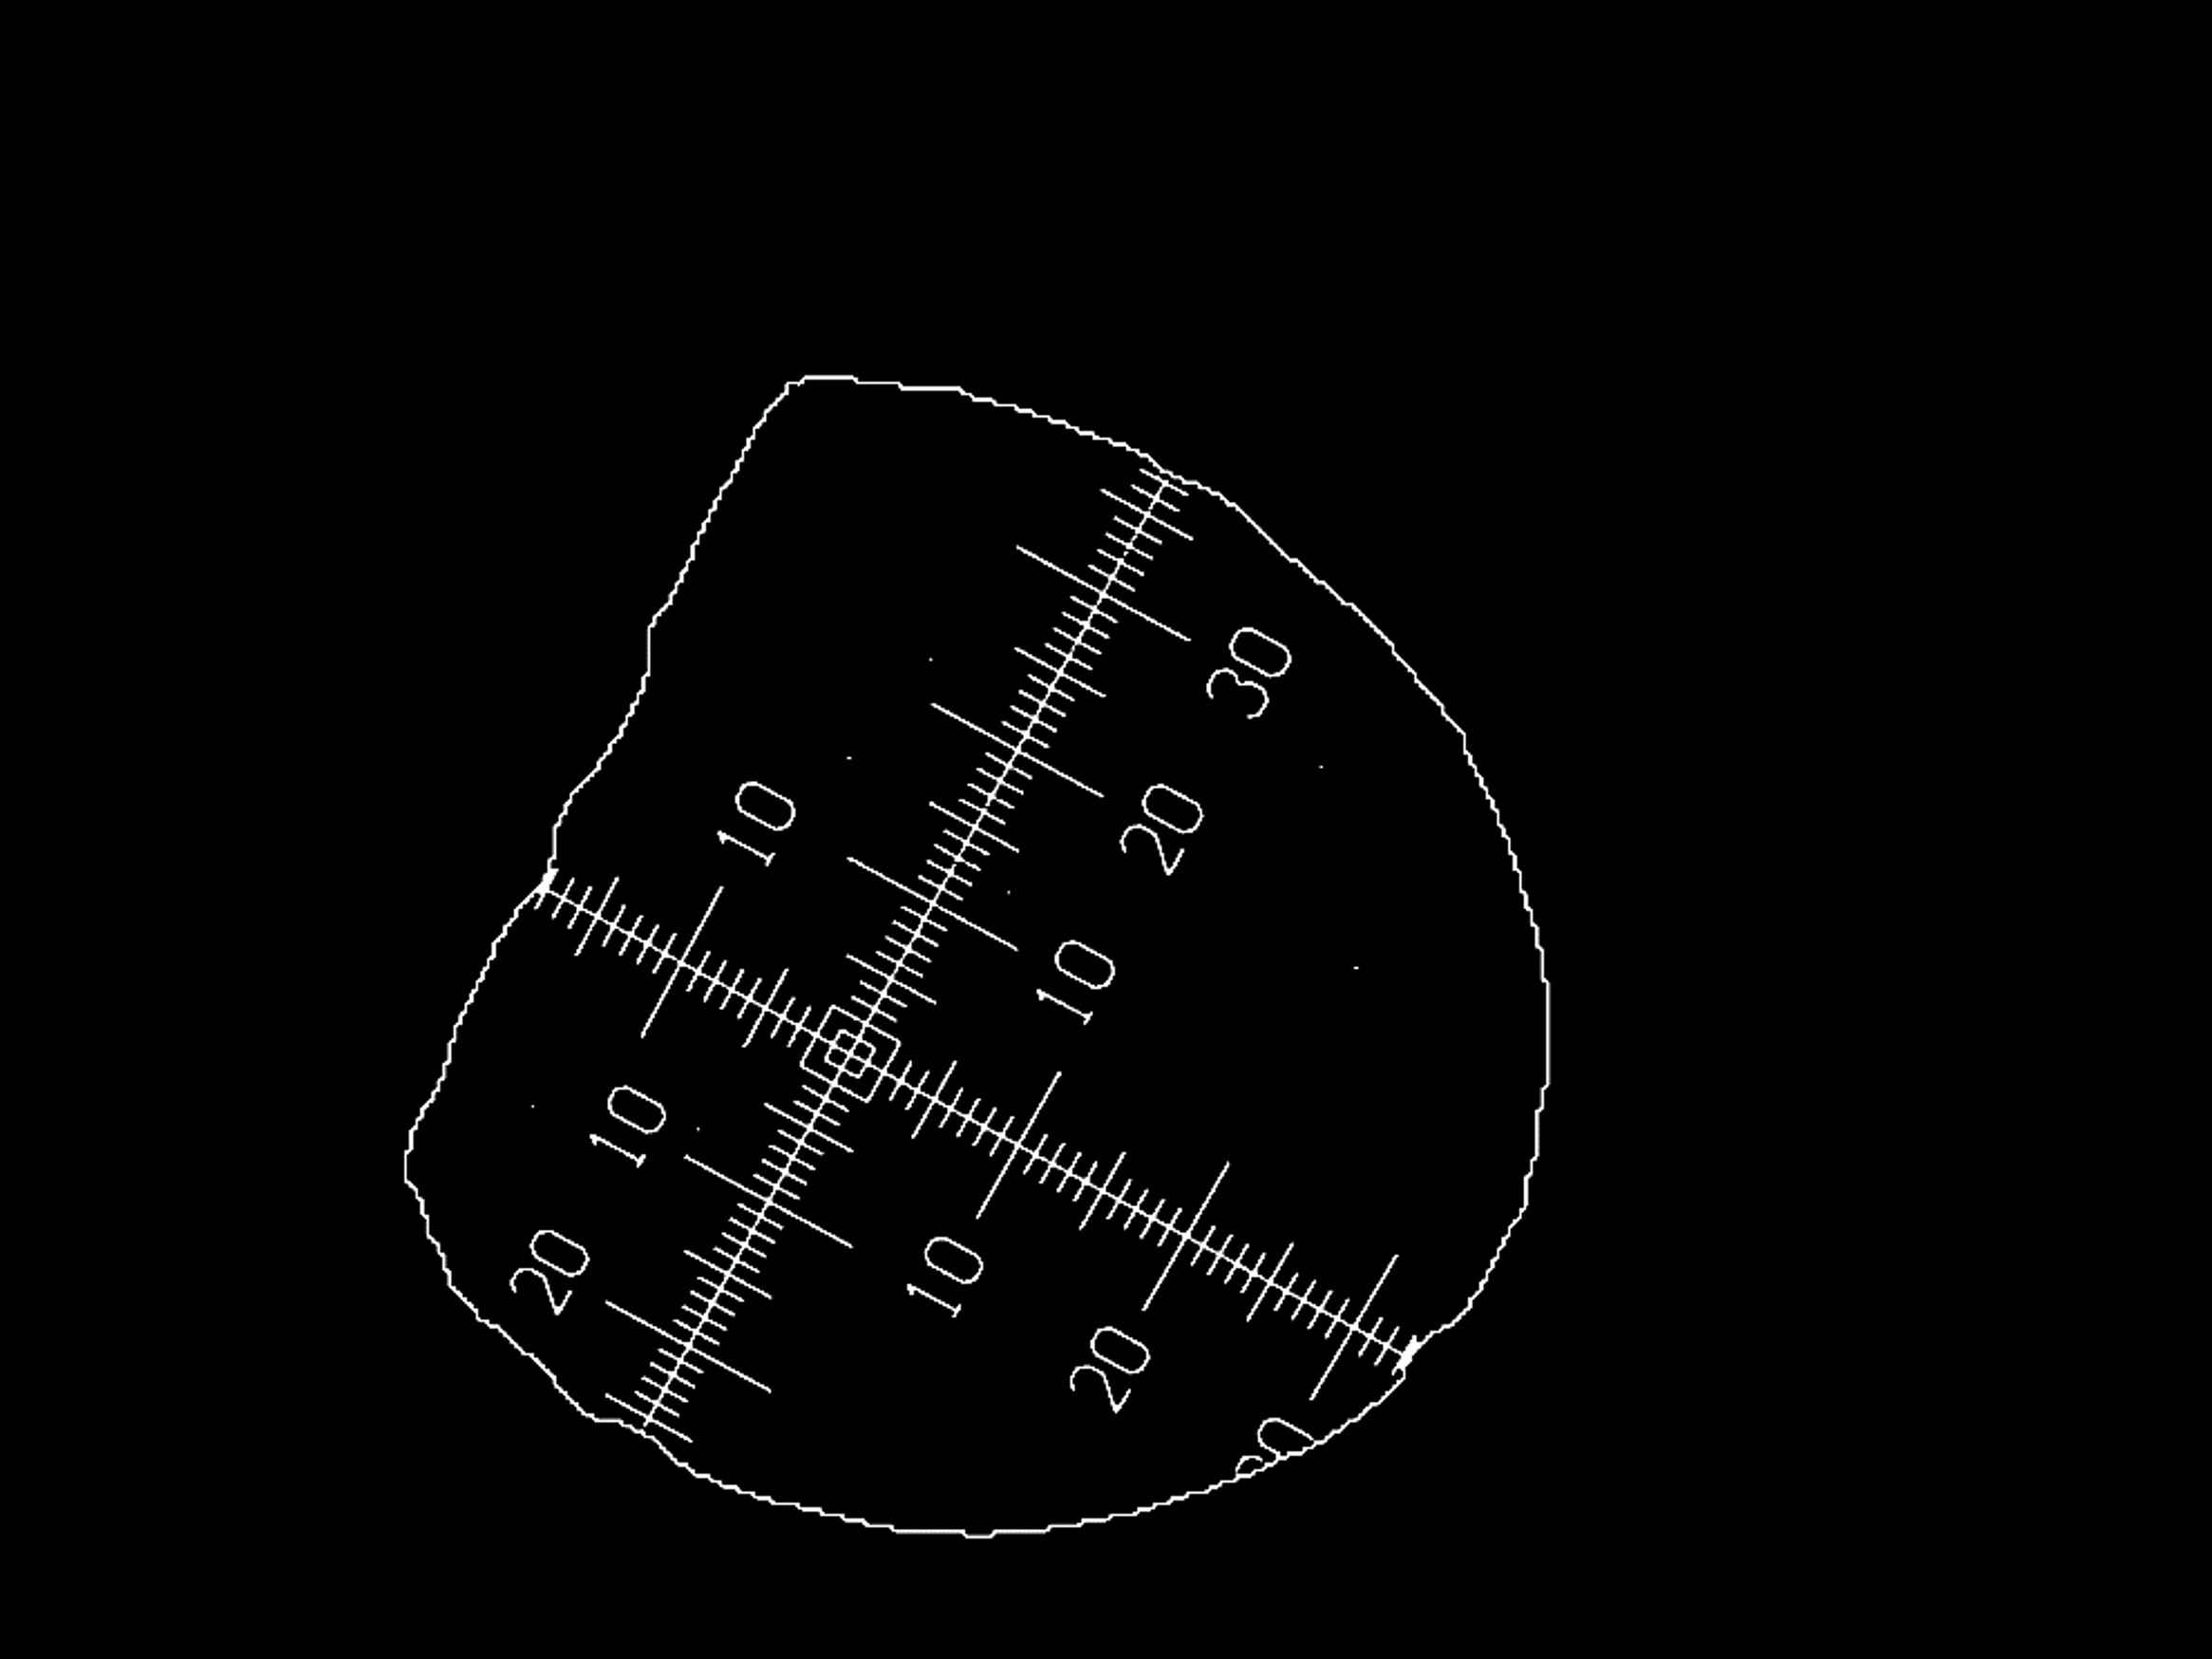
Coordinates Detection: Once the mask is generated, the system detects the markers from the image for further analysis.
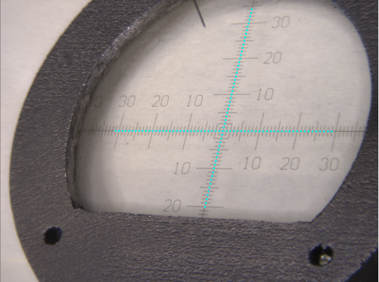
Get Interest Points: After detecting the coordinates, the system aligns and identifies several central points on the reticle used for calibration purposes. Additionally, the user can select which axis represents the x-axis from the camera’s perspective.
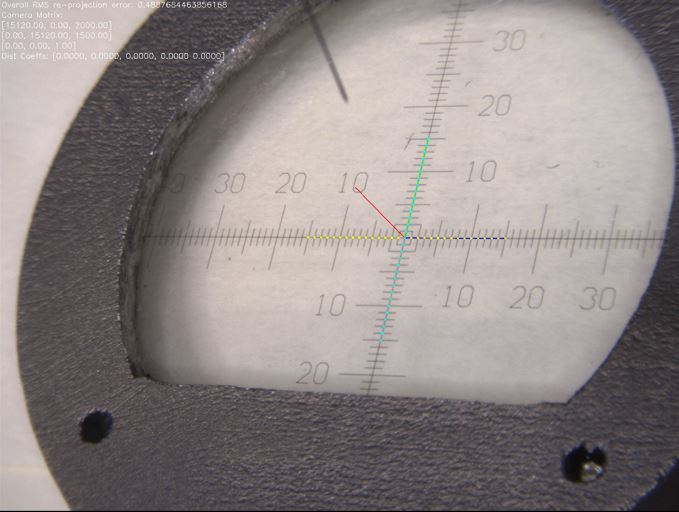
Camera Calibration: In this final step, stereo camera calibration is performed using the detected points. This calibration is essential for 3D reconstruction of the probe tip location in later process.
Please continue reading the rest of the document for detailed steps.
Mask Generation
 Resize→
 Frame Detection→
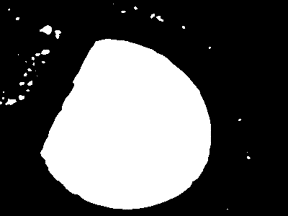 Thresholding→
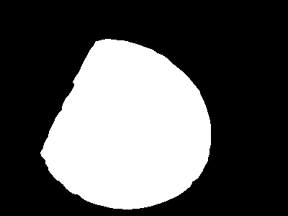 Remove Blobs→
 Invert Image and Remove Blobs→
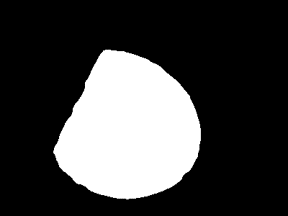 Resize to Original→
 Grey Image
- Resize:
The image is resized to smaller for faster processing. If the image has more than 2 channels (e.g., color), it is first converted to grayscale.
- Frame Detection:
A homomorphic filter is applied to enhance the image by removing shadows and normalizing brightness. A binary thresholding technique is then applied to the image using Otsu’s method to separate the reticle from the background.
- Thresholding:
The image is converted into a binary mask where the reticle and other key features are highlighted. The thresholding step converts pixel values to either 0 or 255 depending on their intensity, creating a sharp contrast between the reticle and the background.
- Remove Blobs:
Small noise or irrelevant blobs, such as reflections on the reticle’s metal window, are removed from the image. Contours are detected, and only the largest contour (likely the reticle) is retained, while the others are filled in or removed.
- Invert Image and Remove Blobs:
The binary mask is inverted so that the reticle becomes the foreground, and any small noise or blobs, such as reflections on the reticle surface, are further cleaned up by detecting and removing small contours.
- Resize to Original:
The processed image is resized back to its original size, ensuring the final mask matches the dimensions of the original input image.
- Grey Image:
After processing, the image is converted back into an 8-bit single-channel grayscale format, ready for further analysis or use in later steps. This process results in a clean, noise-free mask that highlights the reticle, making it easier to detect and calibrate the reticle in subsequent steps.
Coordinates Detection
The following steps outline the process used in the ReticleDetection class for identifying reticle coordinates in microscopy images.
Masked Image:

The image is preprocessed by converting it to grayscale and applying a Gaussian blur. The mask is then applied using the MaskGenerator class, isolating the reticle from the background.
Code Reference:
parallax.reticle_detection.ReticleDetection._preprocess_image()andparallax.reticle_detection.ReticleDetection._apply_mask()
Local Thresholding:
Adaptive thresholding is applied to convert the preprocessed image into a binary image. This step separates the reticle from the background based on local pixel intensity variations.
Code Reference:
cv2.adaptiveThreshold()inparallax.reticle_detection.ReticleDetection.coords_detect_morph()
Median Filter:
A median filter is applied to remove small noise by smoothing the binary image. This step helps clean up small artifacts that may have resulted from thresholding.
Code Reference:
cv2.medianBlur()inparallax.reticle_detection.ReticleDetection.coords_detect_morph()
Invert Image:

The binary image is inverted so that the reticle becomes the foreground. This ensures that subsequent operations focus on the reticle itself.
Code Reference:
cv2.bitwise_not()inparallax.reticle_detection.ReticleDetection.coords_detect_morph()
Remove Noise (Morphological Operations):
Morphological operations, such as closing and opening, are applied to remove small noise and refine the mask structure by eliminating small blobs.
Code Reference:
cv2.morphologyEx()inparallax.reticle_detection.ReticleDetection.coords_detect_morph()
Eroding:
Eroding continues until the system finds a sufficient number of blobs (50 < x < 300), which correspond to the reticle’s marks. It also shrinks objects in the image, removing unnecessary small contours and refining the reticle structure.
Code Reference:
parallax.reticle_detection.ReticleDetection._eroding()
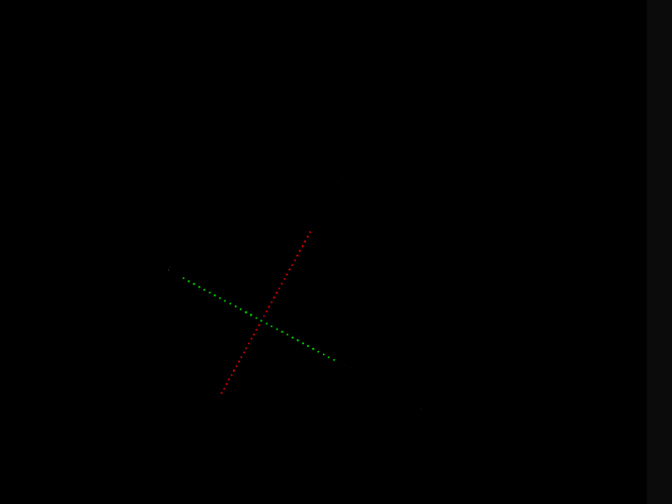
RANSAC to Detect Lines:
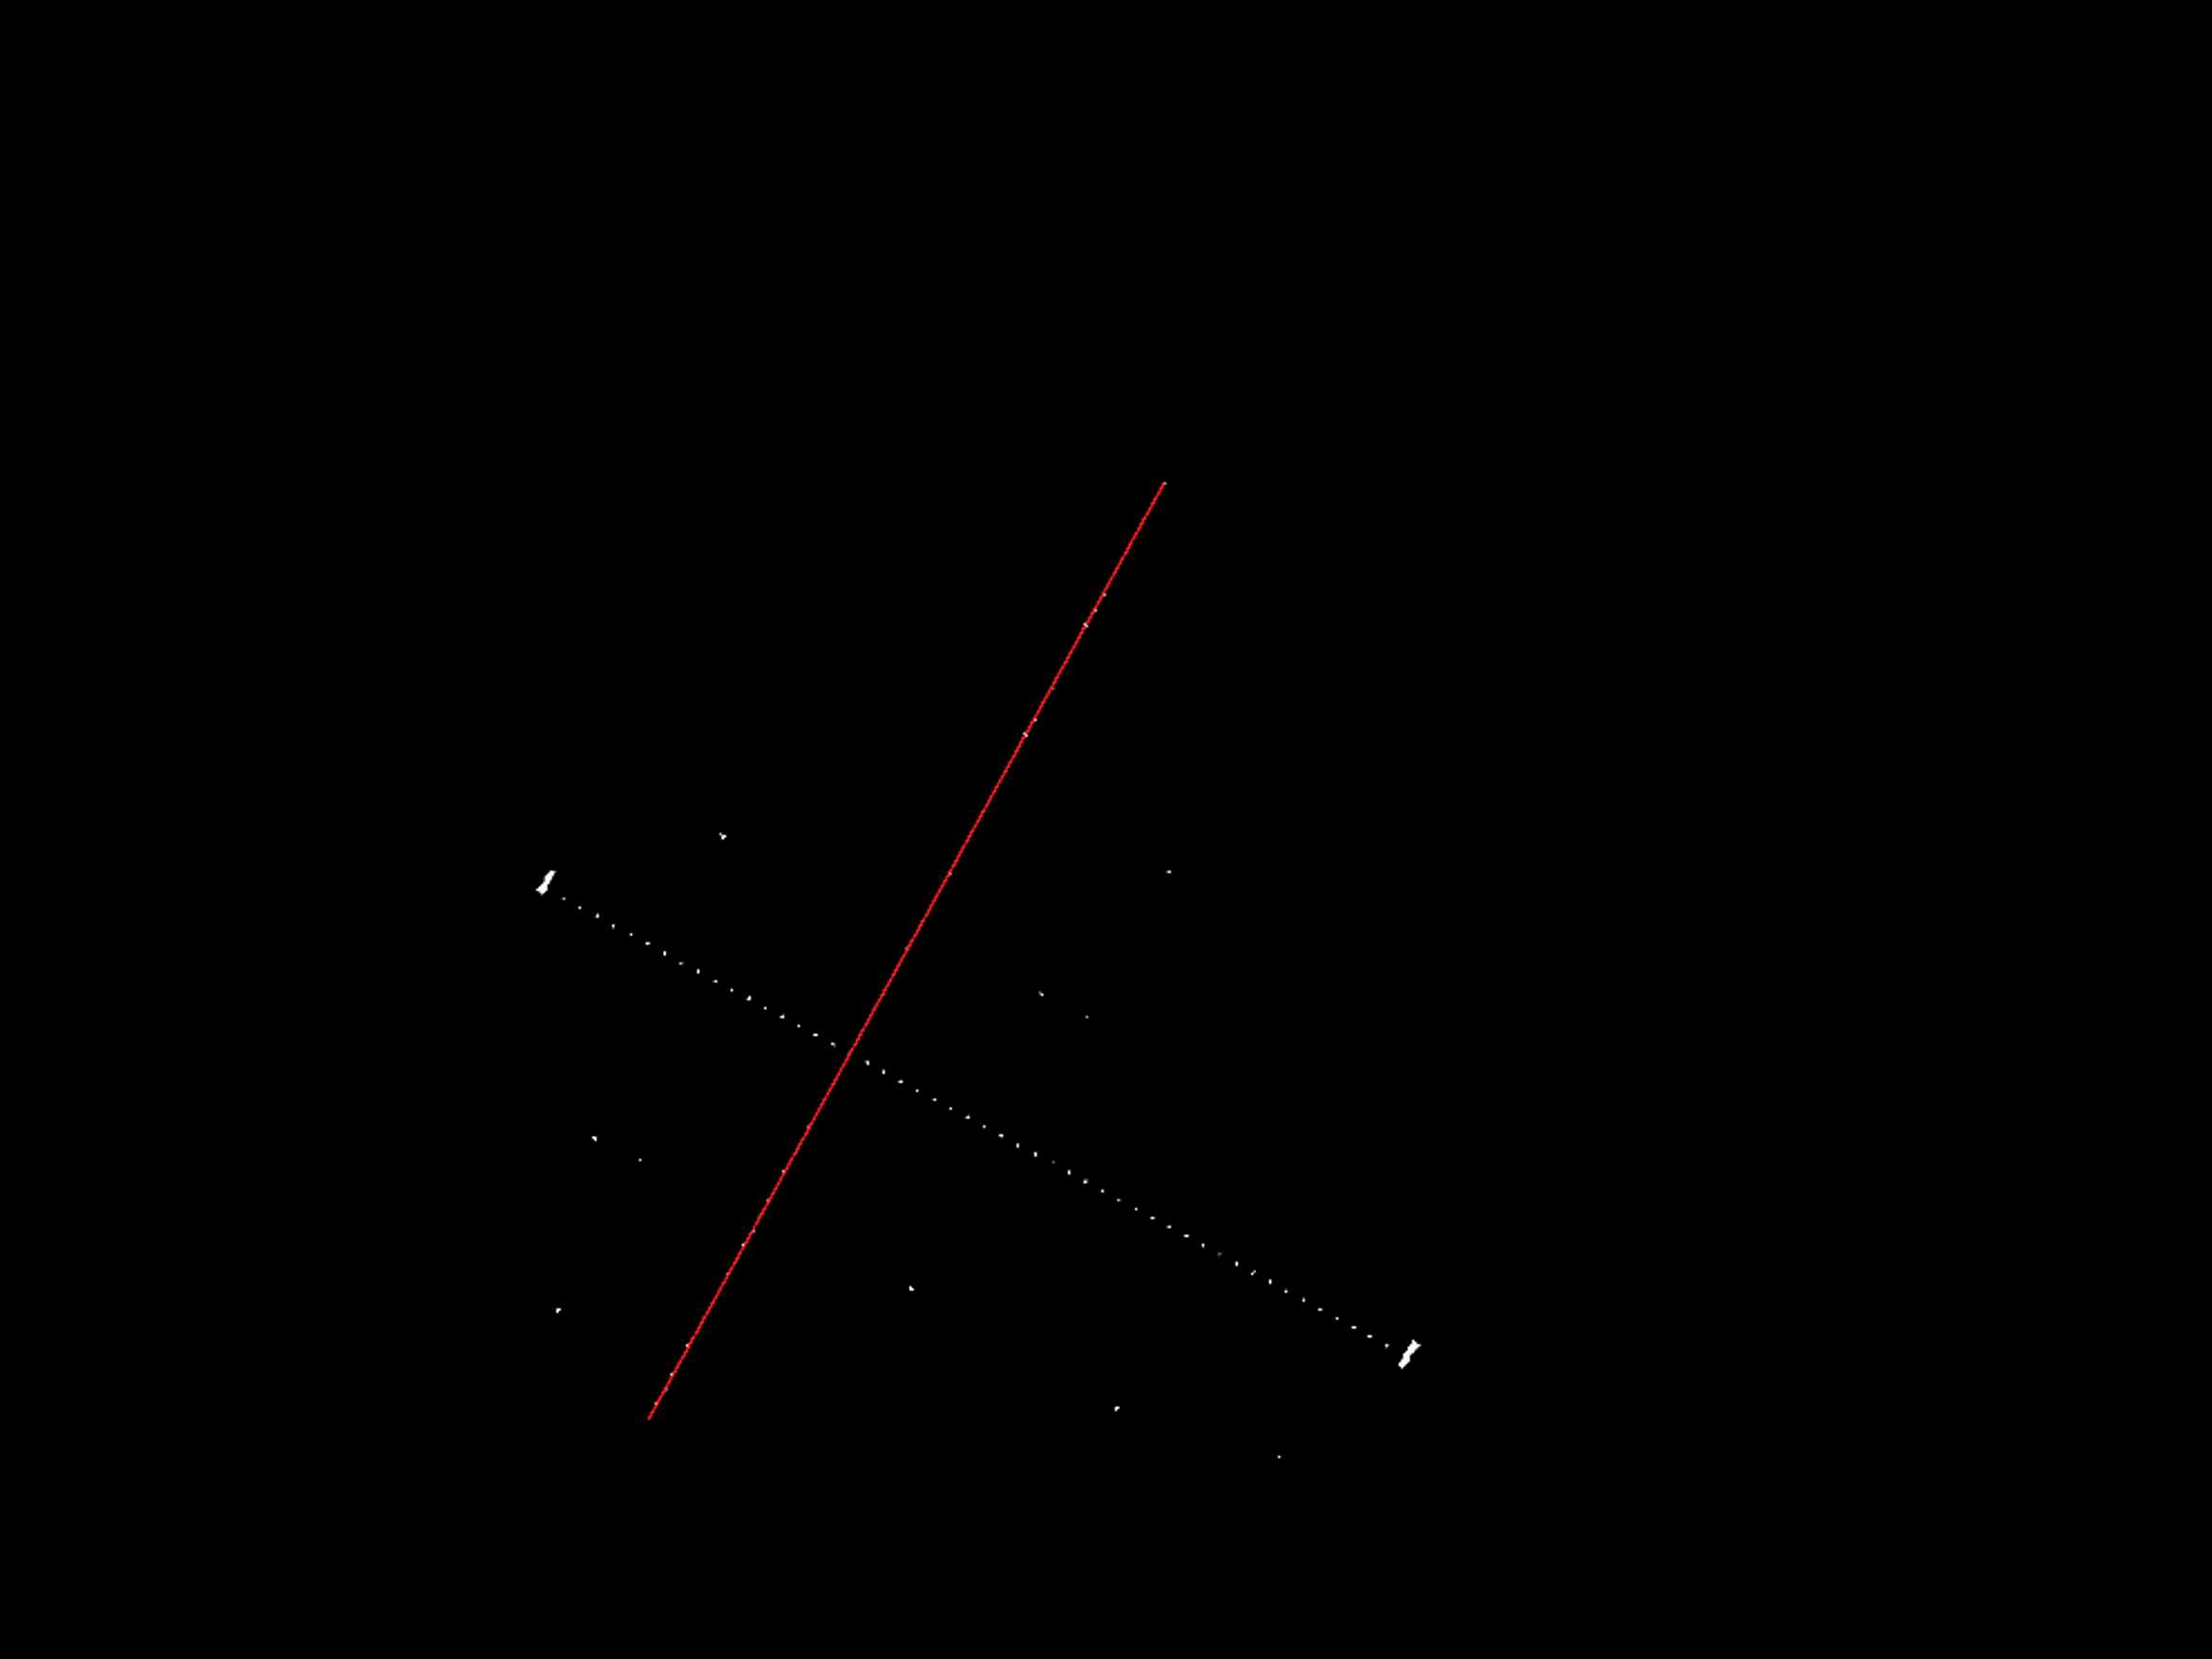
The RANSAC algorithm is used to detect the reticle lines by fitting line models to the inlier points. This method helps handle noisy data.
Code Reference:
parallax.reticle_detection.ReticleDetection._ransac_detect_lines()
Detect 2nd Line:
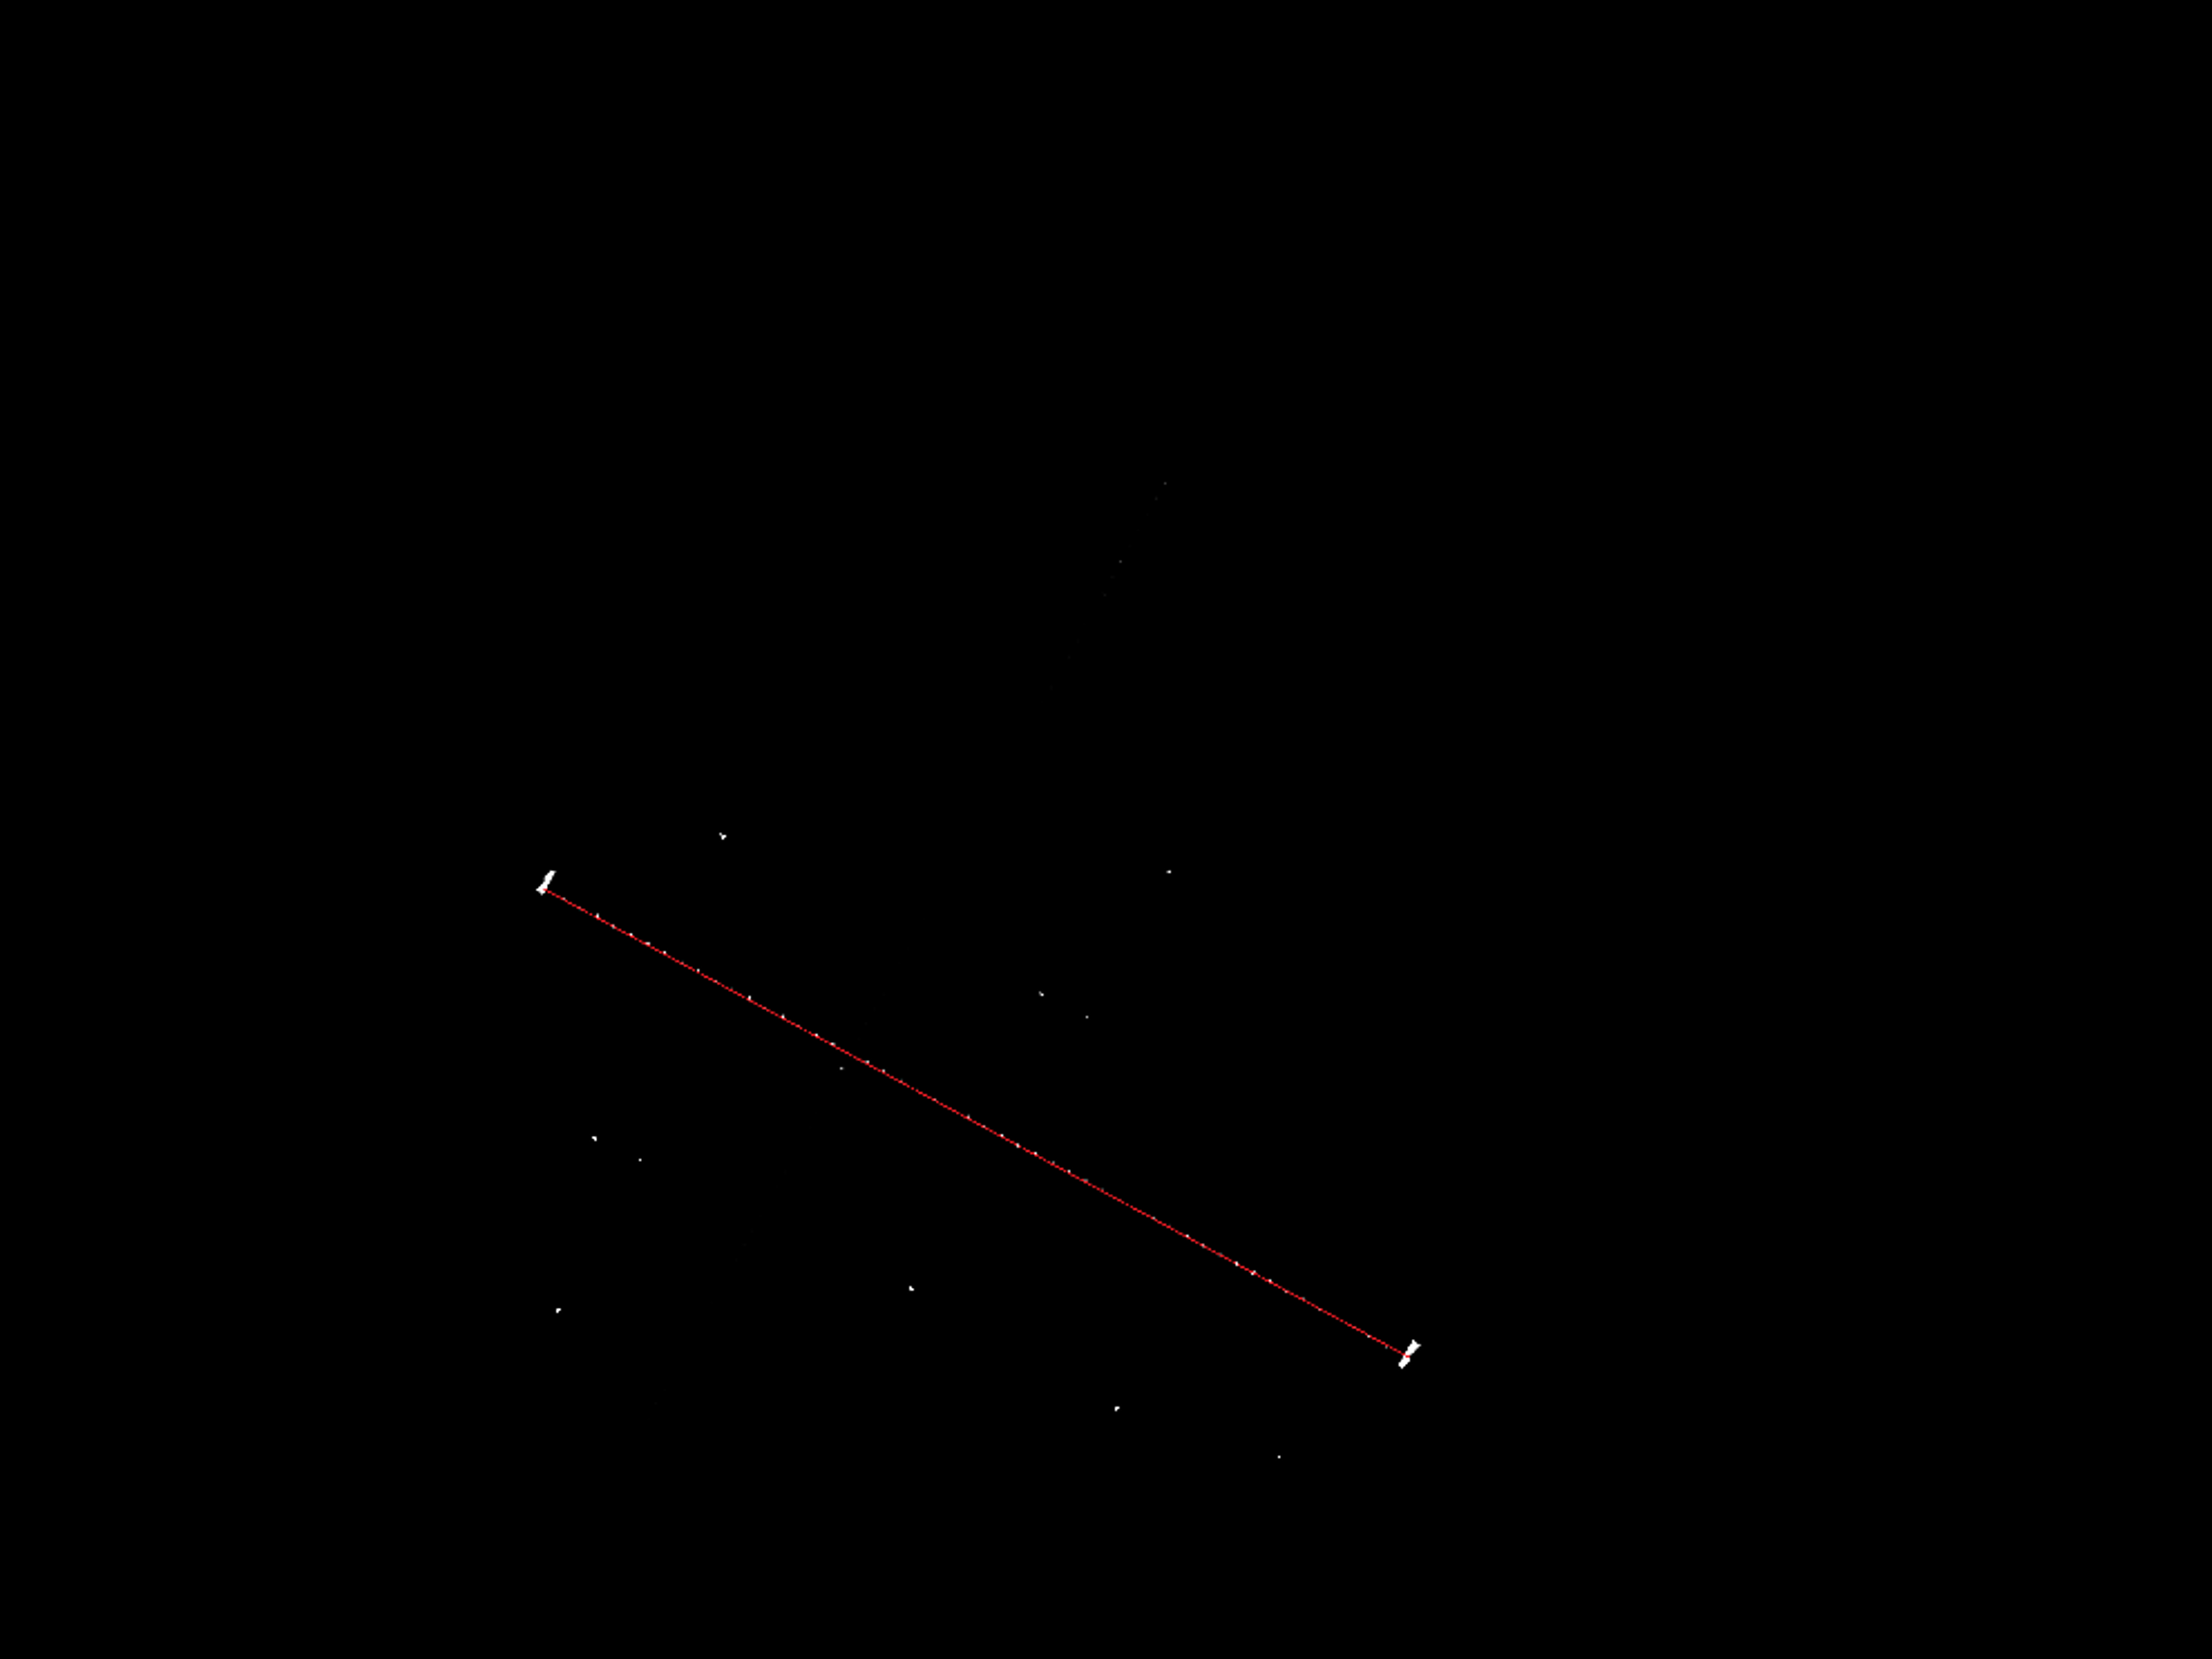
After detecting the first line using RANSAC, the inliers (first line) are removed, and then the second line is detected using RANSAC again. This step ensures that both the x-axis and y-axis lines are detected.
Code Reference:
parallax.reticle_detection.ReticleDetection._ransac_detect_lines()
Interpolate Missing Points:
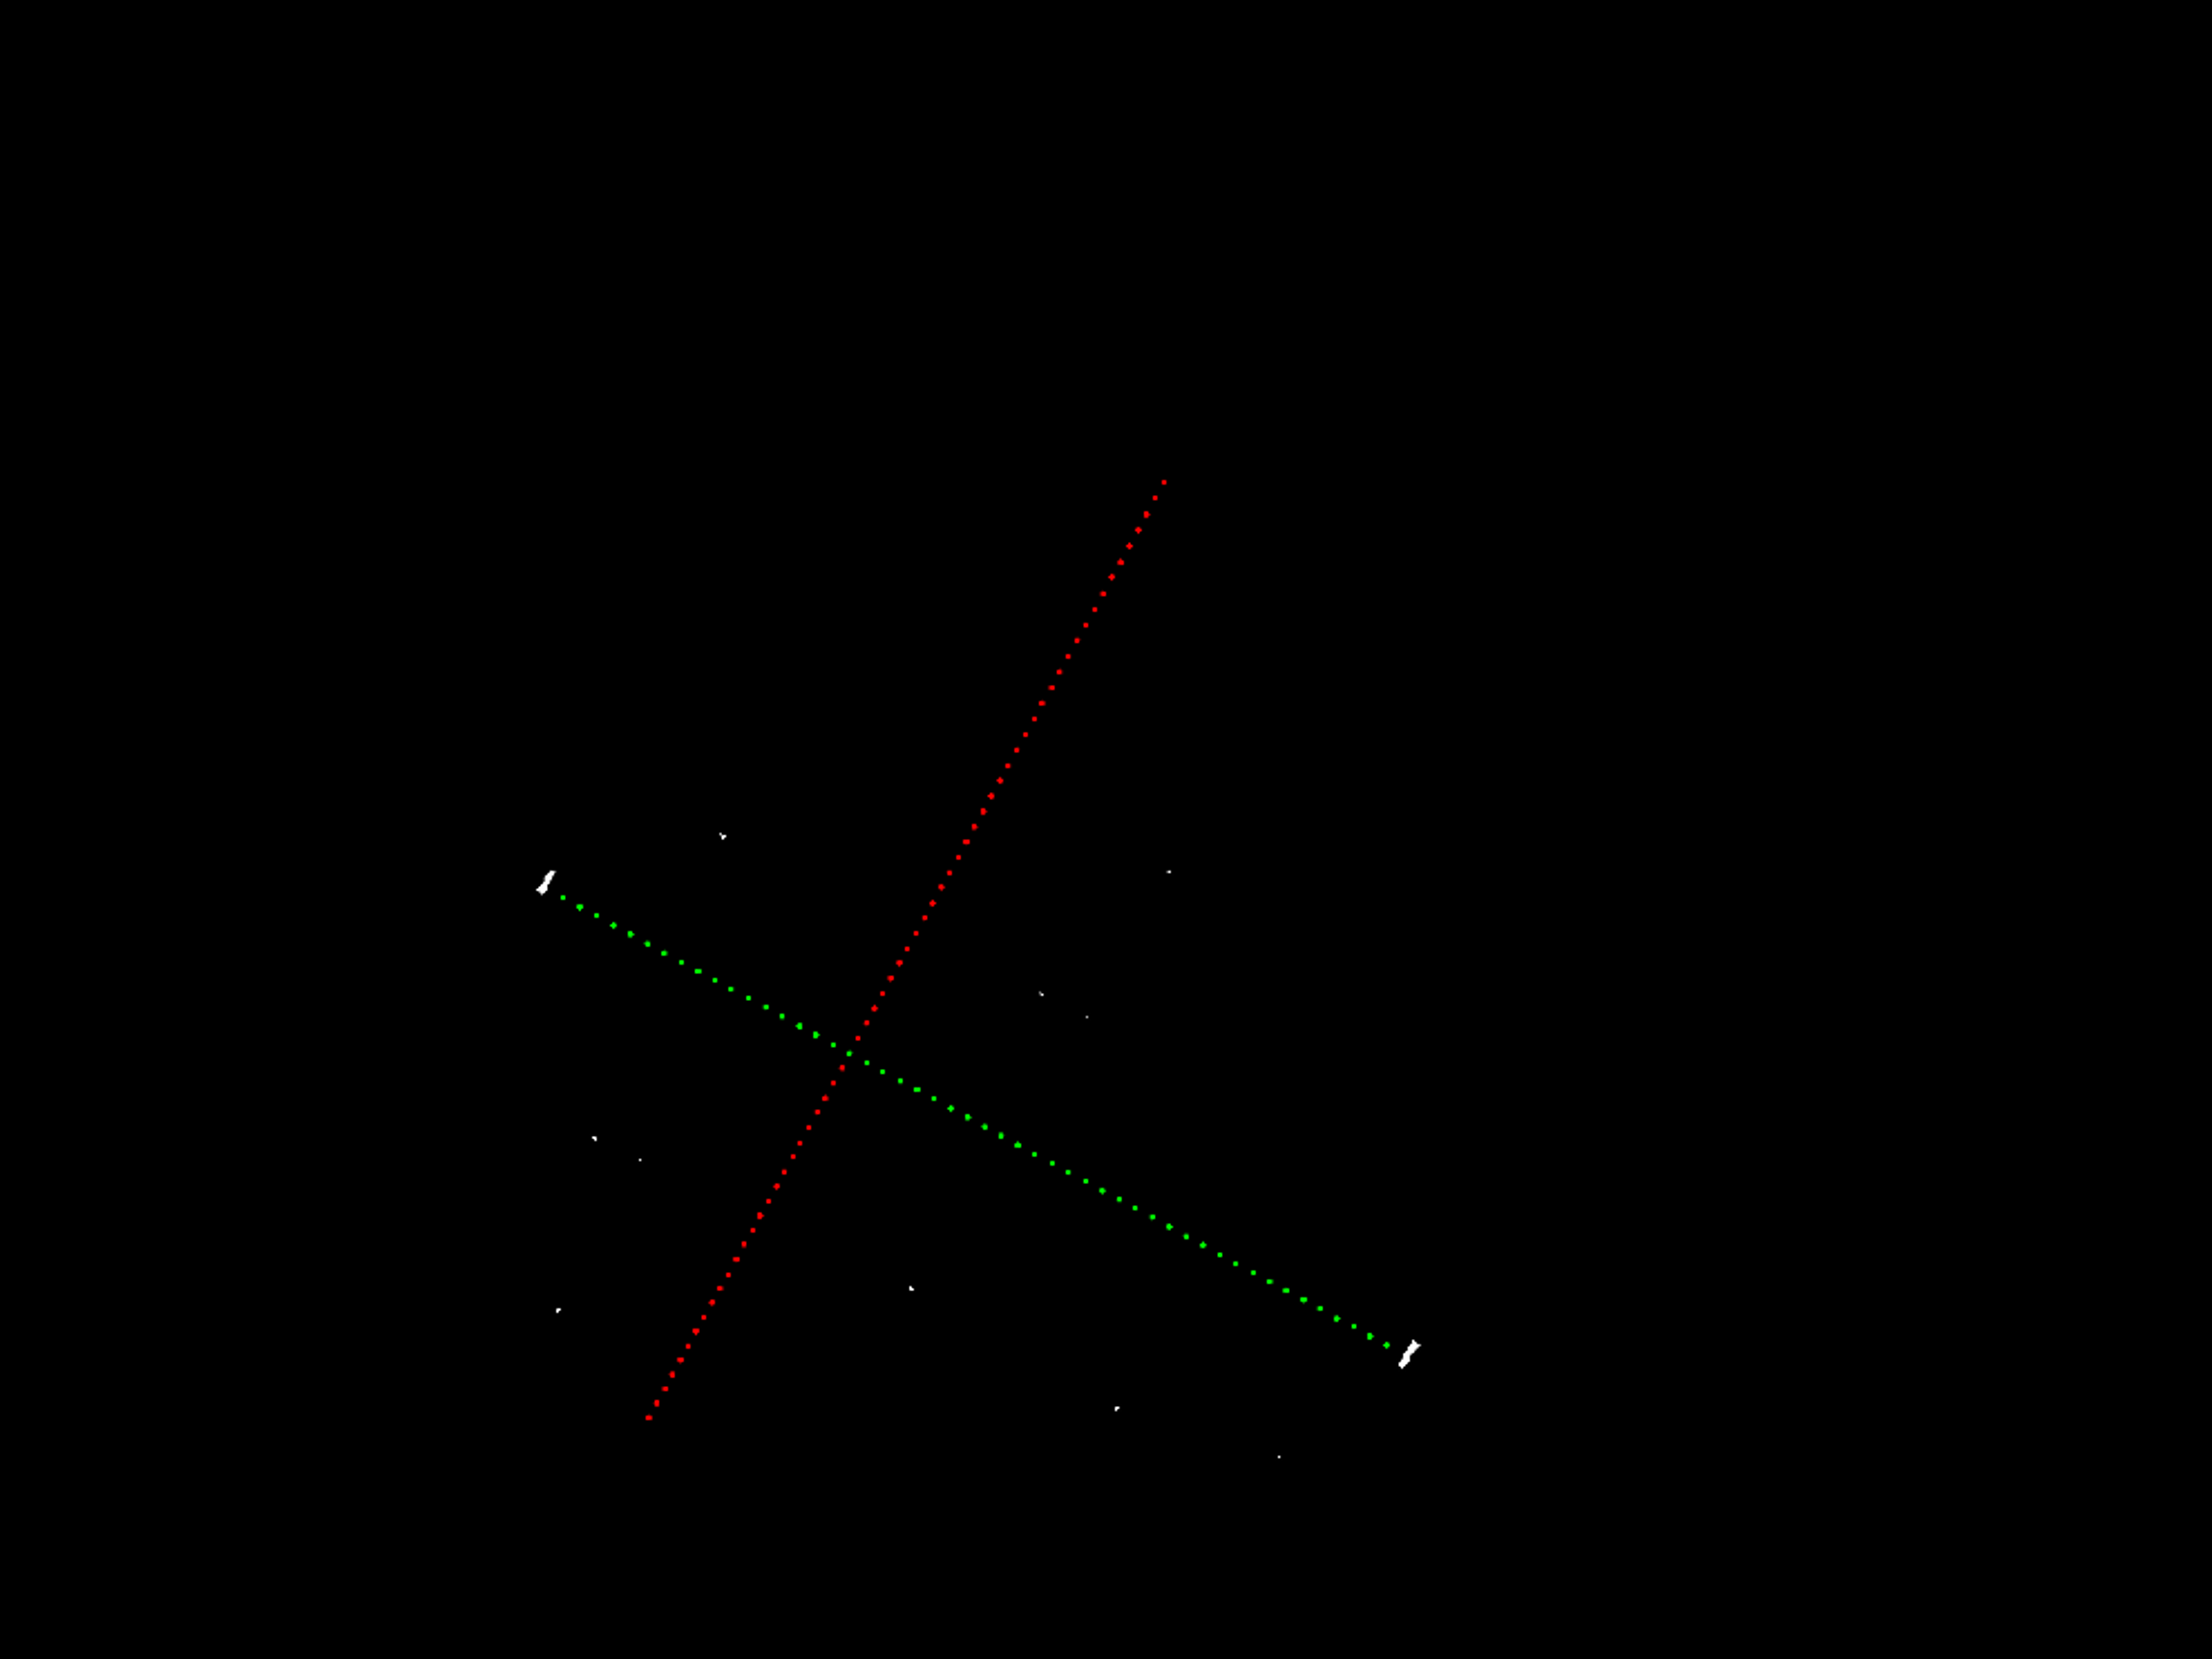
Missing points in the detected lines are interpolated to fill gaps between the detected points, ensuring the lines are continuous.
Code Reference:
parallax.reticle_detection.ReticleDetection._estimate_missing_points()andparallax.reticle_detection.ReticleDetection._add_missing_pixels()
Get Interest Points:
Pixels of interest are extracted around the reticle.
Code Reference:
parallax.reticle_detection.ReticleDetection._get_pixels_interest()